Leah Day of the Free Motion Quilting Project has published a couple of posts this week, that really struck a chord with me and I want to share them, along with my own thoughts, with you too.
Quilt-As-You-Go (QAYG)
The first one is Leah’s Quilt-As-You-Go (QAYG) method for joining pre-quilted blocks into a final quilt. Something ALL us quilting large quilts on a domestic machine should learn.
I first tried this method on this quilt I made in the late 1990s:
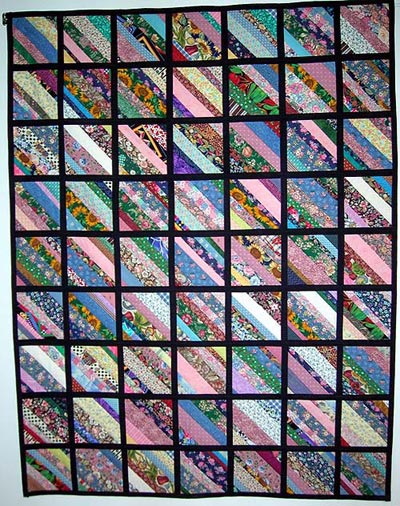
The blocks for this quilt were done with a stitch and flip method. The quilt top pieces, batting and backing were completed at the same time. Then we had to learn how to join the pre-quilted blocks to complete the quilt. The written handouts were poorly done, but the teacher was good and taught us the QAYG technique well. I loved it! It opened up new opportunities to me to be able to quilt my own quilts on a small domestic machine.
Since then, I’ve always been interested in learning more about Quilt-As-You-Go (QAYG) methods. Always striving to find the “perfect” method for me. Over the years, I’ve researched the method in books, on the Internet, and even attended a few workshops claiming to be the “best”. I’ve even tried some of the ideas too. I’ll admit, I was frustrated by some of the ideas I found. I won’t link to them specifically, as it’s not necessary, and doesn’t add any value to my post.
While planning the layout and design for my Scrappy Bed Quilt, I had decisions to make ahead of time on how I was going to quilt this monster 95″x115″ quilt on my domestic machine … and not kill myself in the process. ;)

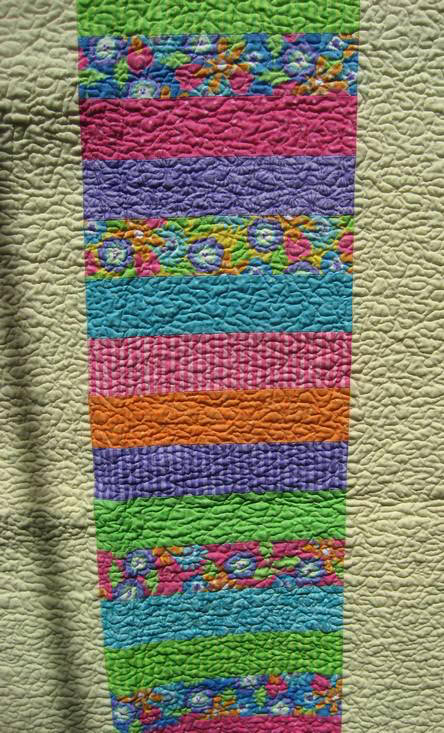
As you’ll see in the photo above, I decided to work in rows for this quilt instead of individual blocks. I could have gone either way, but working in rows meant less blocks that I’d have to join to put the entire quilt back together.
Just for clarification purposes, the photo above shows what will become the top row of my quilt, it does not have the wide, black top border attached yet. It does have the thin white top border and enough extra batting and so that I can add the border once the top has been completed and its side borders added first. At the bottom, you’ll also see the first white sashing strips along with what will become the cornerstones in black and a 1″ or so overhang of batting/backing that will be trimmed to 1/2″ when joining the two rows together.
Drum roll … and getting to the point. Leah’s recent Quilt-As-You-Go blog post and video.
I think she’s nailed this technique perfectly. Finally, a QAYG method that’s explained well, results in a flat, consistent finish, on the front and back, and is easy to complete. For myself, I prefer to hand stitch the back, either using an appliqué stitch or a ladder stitch.
One thing I’d been struggling with in my own plans for my bed quilt, was that the way I had originally planned to put the rows together meant appliqueing both the front and back sashing strips of the quilt. The way Leah’s shown us in her video, she’s stitching the front sections too. Downright Brilliant! if you ask me.
Since my front sashing pieces will finish at 1″, not 1/2″ as shown in Leah’s video, I’ll need to finish my rows/quilt differently than what Leah’s done. Whenever I get back to that quilt, I’ll be sure to share exactly how I did it. I am thrilled that Leah’s technique solved one BIG time-consuming part of my original plan.
What about you? After watching Leah’s video are you ready to give QAYG a try?
It’s NOT “Just Stippling”
The second post from Leah this week that caught my attention was her Love Letter to Stippling.
Have you ever found yourself thinking, or even saying, It’s JUST stippling. I know I have, with my own quilts for sure. Not about someone else’s, that would be mean!
After reading Leah’s post, I have a much better appreciation and even respect for stippling. It IS a beautiful quilt design and really, it’s not as easy to do well as one might initially think. It takes time and hours of practice to perfect, not just to execute the rounded free-flowing curves, but the density of quilting too. This is something I’ve struggled with in the past. I’m still not very good at doing a large meandering stipple. My stippling is often tightly stitched close together with little open space.
An example is my Springtime Chubby Chicks quilt I made for my parents. I used a slightly smaller, closer stitch in the chick blocks than in the white border:
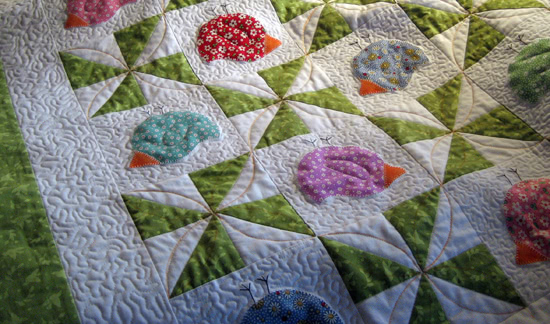
And here is the same quilt after it’s been washed and puckered up nicely. I love the dimension the stipple creates and the raised patchwork.

Here’s my Happy Memories quilt.
I had actually planned to do a quick, large stipple for that quilt, but I didn’t get the density right from the beginning so I ended up working hard to maintain a consistent density throughout the top instead of ripping out the beginning stitches. It turned out fine, but I put in several more hours, and thread, than my initial quick idea!
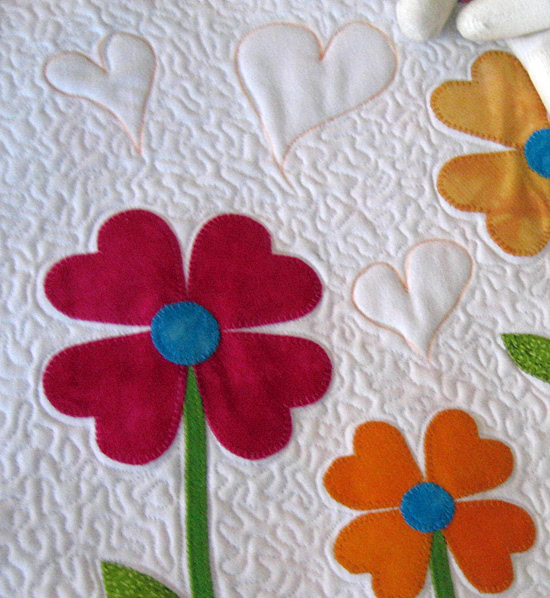
Here’s the latest quilting project, my Love-ly Garden wall hanging. For this quilt, again I’m concentrating on being consistent throughout the entire background. I’ve slowed down while stitching and am looking ahead of where I’m going while keeping the overall area I’m working on in view. I’m pleased with how it’s looking so far.
What about you? Do you have a new respect for stippling after reading Leah’s post?
Be sure to follow along with Leah’s Free Motion Quilt-Along for more inspiration.

I’ve been a follower of Leah’s for a long time now…..and you’re right, that video on QAYG joining is brilliant! I’ve seen others, and this one really explains is well, the demo makes sense, and the outcome is exactly what you want. She’s awesome! And I love the quilts you showed…..the chicks are sweet, and I love the hearts with the flowers, too!
Great post. I think stippling is a fantastic technique, because it lays a foundation for so many other quilting styles.
It’s really good to see some support for “stippling” which I do in all sizes! Many of my quilts are stippled, or meandered, all over as I think it looks good and allows the fabric and patchwork design to show through without the distraction of more fancy quilting. I find stippling sets designs off as no other type of quilting does, although of course other types of quilting are terrific too. I am often making samples etc and find that meandering all over is a faster option as well as the fact that i simply like the look. I use a domestic sewing machine and quilt all sizes of quilts on it, all in one go.
Michele,
My first “big” quilt, the one where I learned to quilt by machine, I chose to stipple stitch. I had an excellent teacher and am just now branching out to quilting in the ditch and going “out of the box” with some fancy stitching for filling in some blanks, almost like thread painting, but I’m far from “liking” that! I just love to stipple!! :)
Thank you for sharing both of these posts. I love stippling – I have always thought it to be a beautiful design feature. I have seen lots of QAYG methods, but the one Leah showed is new to me. My goal this year is to practice my FMQ more and Leah is an amazing resource for that.
i my name is pauline i love your piece quilt i would love for u teach me i