
The Aiming for Accuracy quilt-along (QAL) was held in the Summer/early Fall of 2013. The lessons, blocks and detailed photo tutorials have been removed from this site and are now available for sale as a complete booklet.
Find out more about it here: Aiming for Accuracy Booklet.

I don’t know about you guys, but I’m ready to get our Aiming for Accuracy quilt along started. For today’s post, I’m sharing some of my favourite products that I think have really helped improve my accuracy over the years. On Thursday, I’ll have a few mini lessons that we’ll need as we get started, as well as, some fabric cutting instructions for the background fabric.
Let’s get started …
Aurifil Threads
When I first started quilting, I never gave much thought to the thread that I was using. As long as it was a good quality, general purpose, cotton sewing thread, I used it. However, I have come to realize that a thin, strong thread really does make a difference. It takes up less room when pressing the seams and doesn’t create a mini bump. Less lint is a bonus too so I don’t have to clean my machine as often. I use Aurifil 50 wt. for all of my piecing, appliqué and dense quilting needs.
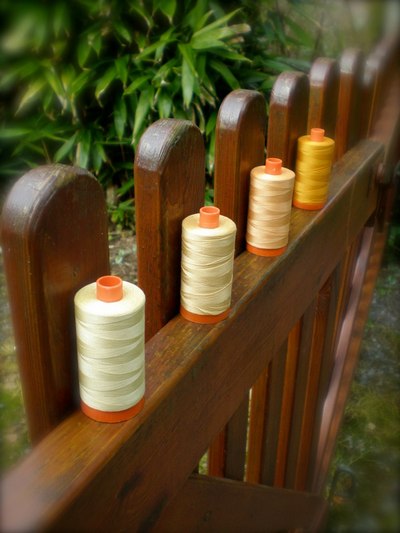
If you can’t find Aurifil at your local quilt shop, you can purchase it online from Bytowne Threads. Full disclosure: I built their web site and am good friends with the owner. MariLyn has excellent prices and great customer service too.
Best Press
The second product that I think has most helped my accuracy is Mary Ellen’s Best Press.
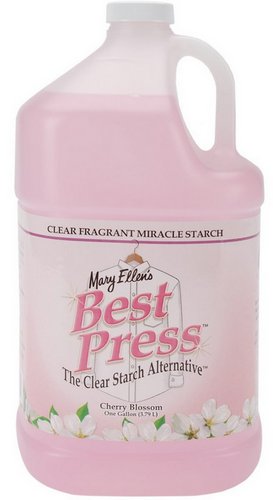
It’s a clear, crisp spray starch and comes in several lovely scents: Lavender Fields, Citrus Grove, Caribbean Beach, Scent-Free, Cherry Blossom (my favourite), Tea Rose Garden and Linen Fresh. With Best Press, there’s no flaking, clogging, or white residue on dark fabrics. A special stain shield protects fabrics, and the product helps resist wrinkles. Best of all, it’s more effective than any starch you’ve ever used. (Adapted from their web site.)
I pre-wash ALL of my fabric, fat quarters and larger, before it goes into my sewing room. I know there are many strong feelings on both sides of the wash/don’t wash debate. I choose to pre-wash. Sure, it takes time, and dealing with the frayed and tangled edges can be a major nuisance. Personally, I hate the smell and feel of fabric from the bolt. I have also had fabric bleed recently and you can bet I was darn glad to discover that bad fabric before I put it into a quilt.
I don’t dry my pre-washed fabric in the dryer, which really helps reduce the tangles. Instead, while it is still damp, I’ll smooth it out with my hands or by flicking/snapping it in the air (really it works), and let it air dry on a rack or just in a folded pile. It dries very quickly.
I use Best Press to add body and stiffness to the fabric before cutting. I just lightly mist the fabric and I like to let it soak in and iron 1/2 hour or so later. I’ll also use Best Press once my block is completely sewn. You’ll be amazed at how crisp your seams will be. Depending on the quilt, I may even use it again once the entire quilt top is sewn before I baste it. For quilts like my Postage Stamp or Strippers that have so many different fabrics and seams, Best Press is a definite must.
Quilter’s Quick Quarter
The method we’ll be using to make our triangle units, requires that we draw a diagonal line on the back of our fabric and then sew 1/4″ from the centre line on both sides. However, I have difficulty with this, it’s an eye thing, and prefer instead to draw my stitching lines on my fabric as well. I have this very hand tool, Quilter’s Quick Quarter that makes this easy.
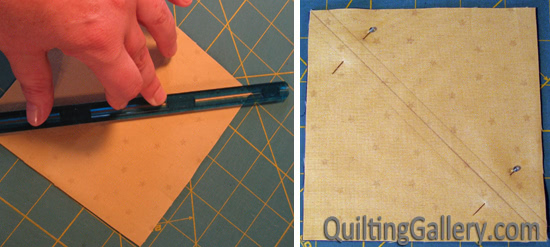

Here’s a video on using the Quilter’s Quick Quarter tool:
Perfect Half-Square & Quarter-Square Triangles Ruler
The Aiming for Accuracy quilt has a tonne of half-square, quarter-square and split half-square triangles in it. To quick-piece these units, I always over-size my squares, draw diagonal lines down the centre and once the units are complete, square them up to the required unfinished size. To square up these units, my favourite tool is the Perfect Half-Square & Quarter-Square Triangles Ruler from June Tailor.
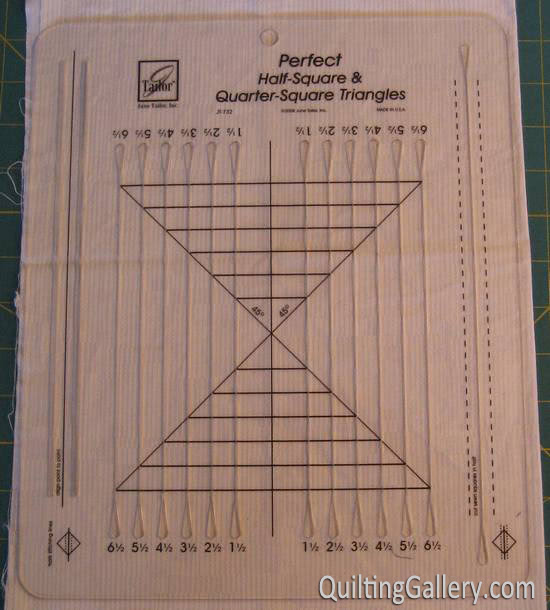
Once your triangle unit has been sewn and pressed, you line up the diagonal with the lines on the ruler and trim two sides at once. The plastic has grooves where you place your rotary cutter. You then rotate your unit, line it up and trim again.
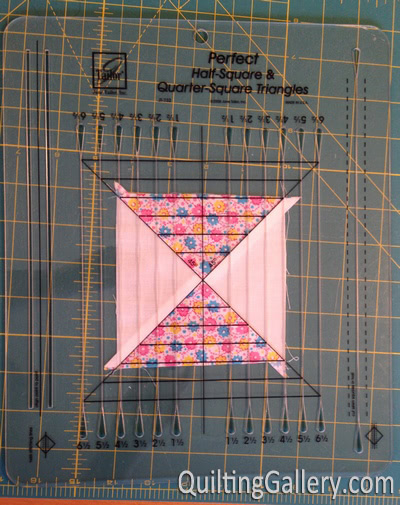
Here’s a video showing how this ruler works:
Easy Square Junior Ruler
Another great ruler for squaring up half-square triangle units is the Easy Square Junior Ruler.
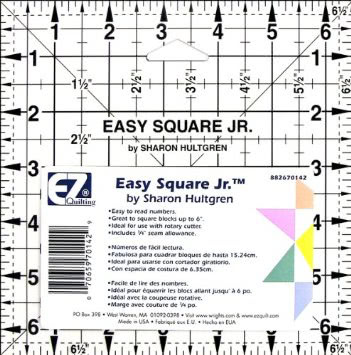
I love the easy-to-read lines on this ruler and use if quite often when cutting scrappy patches and squaring up triangles.
Sewline or Bohin Fabric Pencils
Since we have many triangle units in our quilt, we need a good marking tool to draw our sewing lines on our fabric. I really like both the Bohin and Sewline chalk marking pencils. The lines are very thin and erase easily. I use them to mark quilting lines too (in small sections, as the chalk does rub off with handling).
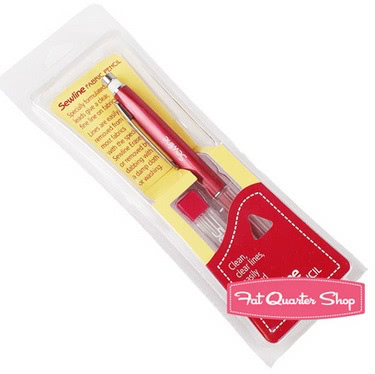
The Fat Quarter Shop has all Sewline products on sale this month too.
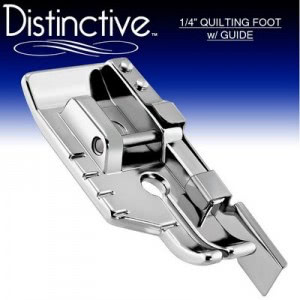
1/4″ Piecing Foot
All piecing of our quilt top is done with a 1/4″ seam allowance. If your machine doesn’t have a 1/4″ foot, check with your local dealer or the foot shown below by Distinctive looks promising. Be sure to check your owner’s manual to determine what kind of foot you need.
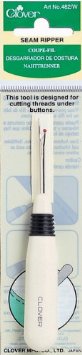
Clover Seam Ripper
There will always come a time when you have to rip out stitches. For this, I love my Clover Seam Ripper. It’s sharp and has a nice, thin blade/point at the end. I’ve had mine for a couple of years now, and it’s still working as good as new.
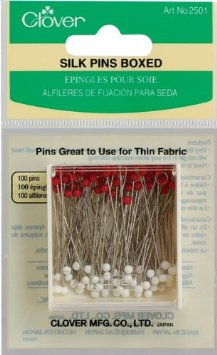
Clover Silk Pins
I admit, I have a pin fetish. My current favourite, are the red & white tipped Clover Silk Pins. They are perfect for piecing and hold multiple layers of fabric very well.
Do you have a favourite notion/tool that’s helped you improve your accuracy? Share below.
Thank you for this post, I am doing almost all of this, exepted the pre-wash and socking of fabric. Not sure I like the smell of the unscented starch and I dislike smelly stuff.
Can’t wait for Thursday.
I love many of the same tools/notions. Especially with small blocks with many pieces, Aurifil thread for sure.
Here’s a couple where I have different favorites.
For making HSTs I use a Paper Mate Sharpwriter mechanical pencil. I can to very lite lines easily with this. They are very inexpensive and come in a box of 12.
My favorite new seam ripper is by Seam Fix. It has an end that you brush over the cut thread and it quickly removes all the little threads — works really well.
I’m a bit of a pin snob too:) My favorites are Dritz Flat Button Head Pins. They are cute, with their little button shaped heads, but they are so practical because they are flat, and bonus, you can iron them because they are ‘no melt’. A friend gave me a pack a few years ago, and I haven’t used anything else since.
Another suggestion, if you are like me and have several projects going at once, get a container to keep everything for the project in. Saves time hunting and searching:)
I’m eager to get started.
How do you find the quarter line tool on the June Taylor square vs the quilter quarter tool?
One more questions Michele. Do you know if the running stitch store carries all of these tools?
I am full of questions today. If I want to splurge and buy Aurifill threads, what basic colors should I get. White, beige, grey and how many spools. 1300 m last for how long?
My favorite thread for piecing is Prescencia 60/3. It is available online a couple places. The cost of a cone is a bit off-putting at first, but it works out to just over 1/2 penny per yard. I’ve been using the same gray cone for 2 years now – about a dozen lap sized quilt tops – and there is still a lot of thread left on the cone.
For piecing you really only need a few neutrals – I have a cream and a gray depending on the fabrics I’m using.
As I recall the Aurifil is a 2 ply thread, and the Prescencia a 3 ply – which is a little stronger.
Cheers, K
I use a stiletto when piecing. A wooden skewer can work in a pinch.
The square up ruler…will we need the 6 1/2″ size?
I love Aurifil thread, but have to agree with Kirsten that Prescencia is stronger. I saw Harriet Hargrave demo that strength test with both. Yes, the Aurifil is 2 ply, 50 wt.
Here’s a link to where you can order Prescencia thread. No affiliation.
http://www.presenciaamerica.com/Cotton-Thread-50-wt-Spool-500-meters.html?product=Quilting%2FSewing+Spools+50+wt%2C+500+meters
Great suggestions Mishka! Thank you!
I love those June Taylor plastic rlers that allow you to make mltiple cuts on one piece of fabric. Just a word of caution – always hang your ruler up or lay it flat when not using. I kept mine on my cutting table but leaning against the wall behind the table – the plastic warped!!
Diane
mmmm -the above comment just made me realize that my “u” is sticking on my keyboard! Sorry ’bout that!
thanks for the product reviews nice to know.
Interesting for me to realize that I would agree with most of these and could have written this post :) LOL! I just love Aurifil thread and Best Press and the silk pins, etc….
I just haven’t tried these rulers yet, so will have to get them!
Thanks!
I like using starch, but dislike the price. I buy concentrated starch in the laundry aisle of the drug store and dilute it about 1:10 for just a little crispness. Stronger if I need it. VERY inexpensive, no white flakes, no scent added.
I love this project, and think I’ll get started!
Thanks for all the wonderful instructions.
I absolutely love Clover’s Fork Pins. They are great for pinning around any intersection that you want to have nest, i.e. the middle of a four patch. They are essentially two pins connected at the top, so you only need one per intersection. They have helped my piecing immensely.
Re Washing Yardage: If you sew the two cut ends together using a long, easy to remove stitch setting, your fabric piece will not twist and tangle at all.
I prewash all of my fabric before it goes into my sewing room also. To take care of the problem of frayed ends I serge each end before it goes into the washing machine.