To create split quarter-square triangle (SQST) units, we start with four squares that are cut slightly oversized and then the unit is trimmed accurately to the size needed. SQST units, also referred to as half-quarter-square triangles, contain one half-square triangle and two quarter-square segments to complete the square unit.
Using four squares to start will yield four SQST units, two of which are mirror images. In the photo below on the left, note that the black and turquoise units are mirrored. The photo on the right shows that it’s impossible to take four units and make a pinwheel.
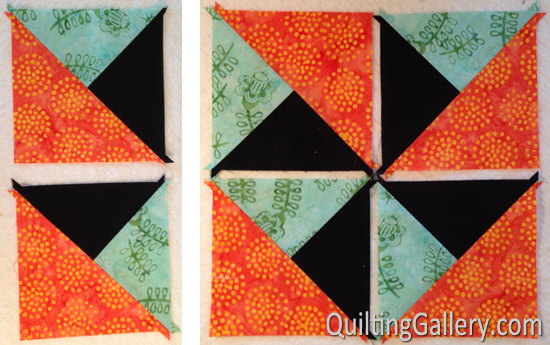
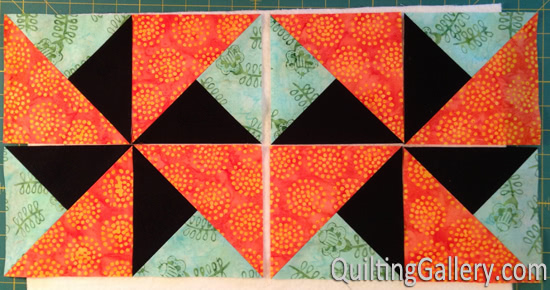
If you wish to create a pinwheel unit, you’ll need two sets of four squares to get the desired effect, which will result in two pinwheel blocks that are mirror images.
To determine the size of squares to cut, you must first know the finished size of the SQST unit you are making. Then for the segments that will be quartered, add 1.5″ and for the segments that will be halved, add 1″ to the finished size.
For example if you wish to make a 5″ finished unit and you are creating two mirrored pinwheel units (as shown in the photo above), the two quartered fabrics (i.e. black and turquoise) will be cut at 6.5″ and you’ll need two of each colour. For the half segment (i.e. orange), you’ll need four 6″ squares.
Step 1:
From the larger squares that will form the quartered units, follow the instructions to create four half-square triangle units (HSTs). Draw your diagonal line (or sewing lines), stitch your units, press, cut apart and press the seam to one side (or open if desired). You will now have four HSTs. Don’t trim these square yet.
Step 2:
Draw diagonal lines on the back of the four smaller squares that you cut above (i.e. 6″ orange). Layer your HST unit created above with one of the smaller squares so that the diagonal line you’ve drawn on the back goes in the opposite direction of the HST diagonal line. Don’t worry if these squares don’t line up perfectly, you’ll be trimming the units at the end.
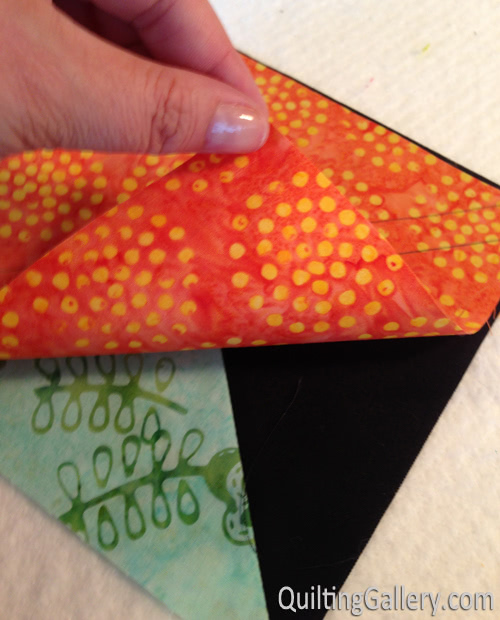
Stitch on the diagonal lines (or 1/4″ away from the centre). Press to set the seams, then cut the units in half. Press the new seam open or if pressing to one side, press towards the newly created half square unit.
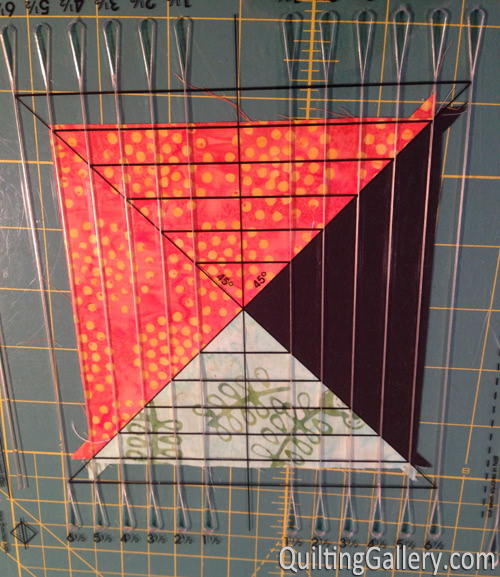
Square the units to the desired unfinished size being sure to maintain the diagonal lines as accurate as possible. If you’re following the measurements above, you’ll trim your units to 5.5″ which will then be 5″ once completely sewn into your quilt top.
Download Free Tutorial
This split quarter-square triangle tutorial is available as a free PDF file. It can be downloaded by using the Add to Cart button below and following the instructions on the next page.

Disclaimer: This free tutorial and all photos are copyright Michele Foster of Mishka’s Playground. I would be happy for you to share a link to this tutorial and one photo on your own blog. However, please do not copy the entire tutorial for free or for sale, and republish it as your own anywhere. Instead link back to this page for the instructions. Thank you for respecting my copyright and the amount of time and effort that has gone into creating this free tutorial.
The site to download (add to cart) the Split Quarter Square with Half Square Triangle cannot be found.
Would you be kind to send a better site for this pattern??