Quarter-square triangles (QST) can be made with two, three or four different fabrics. QSTs are made from two half-square triangle (HST) units that are stitched oversized. Two HST units are then layered right sides together and stitched diagonally in the opposite direction to form the QST units. To determine the starting square size, the math for QSTs is unit finished size + 1.5″.
Here’s a very short video on making quarter square triangles (I prefer to cut mine a bit larger):
Start with two squares that are 5.5″ square. These will make two (2) 4″ finished QST units (or 4.5″ unfinished).
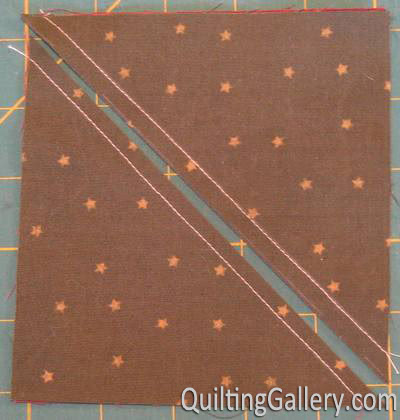
As we do for HSTs, layer two squares right sides together. On the back of one of the squares, draw a diagonal line corner to corner and stitch 1/4″ away from that line on both sides. Press to set your seams and cut the HSTs in half. When you open up your HST units, be sure to press both pairs toward the same fabric. Don’t trim these units yet!
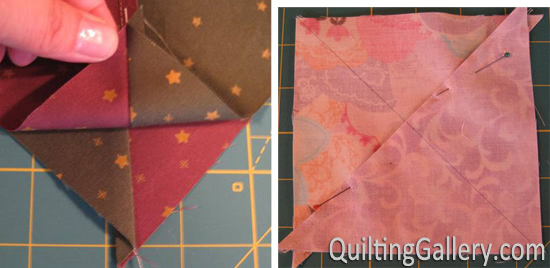
Layer your two HST units right sides together, with your fabrics on opposite sides. Run your finger along the middle seam to ensure that the two units are nested together nicely. They should fit nice and snug. Pin if necessary to secure the nested seams. If you’re pressing your seams open, stick a pin directly in between the stitched seams of both HSTs and secure the centre with pins on both sides of the seam allowance.
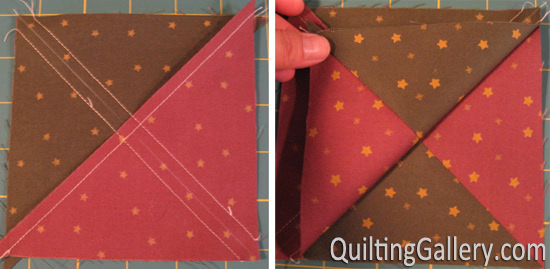
Draw a diagonal line, corner to corner, in the opposite direction of the HST seams. Stitch 1/4″ on both sides from that centre line. When you’ve finished stitching one line, double check that the intersection matches before stitching the other diagonal line.
Press your block, then take a peek to double check that your intersections look good. Cut in half. You now have two QST units.
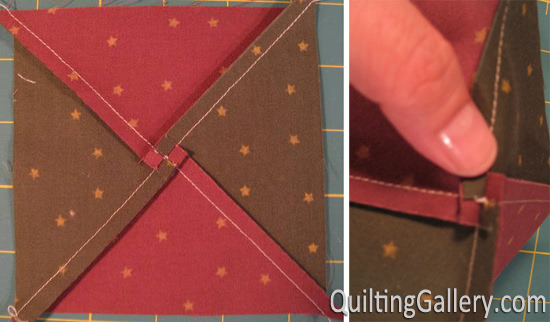
If pressing the seams to one side: since the QST unit is considered a four-patch, because it has four seams that meet together in the middle, in order to have a nice flat block, spiral the seams. This is what it looks like when done:
If pressing the seams open, you do not need to worry about the extra bulk in the middle.
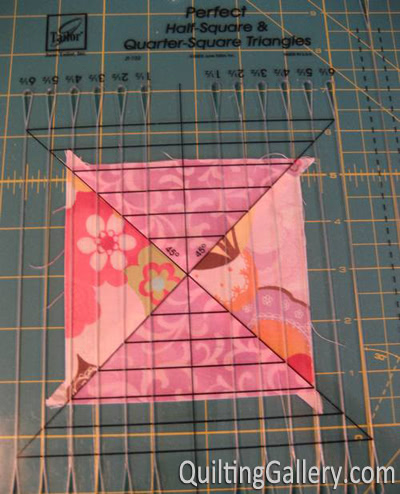
Trim and square up your units to the unfinished size. On the first cut, line up the diagonal line on your ruler with your block, with extra fabric to be trimmed on all four sides. Trim the right side and top of your block. When you make the second cut, you’ll line up the two sides you just cut at your 4.5″ mark on your ruler plus the diagonal line in the centre. Trim.
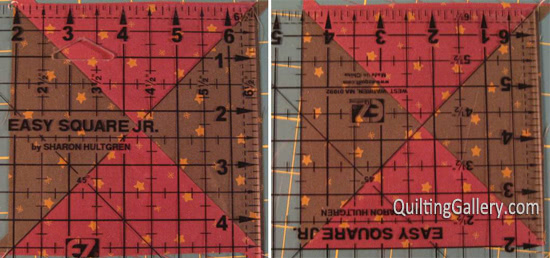
I prefer to use June Tailor’s Perfect Half-Square & Quarter-Square Triangles Ruler for trimming QSTs as it makes lining up the two diagonal lines very easy.
Here’s a video for this ruler:
Download Free Tutorial
This quarter-square triangle tutorial is available as a free PDF file. It can be downloaded by using the Add to Cart button below and following the instructions on the next page.

Disclaimer: This free tutorial and all photos are copyright Michele Foster of Mishka’s Playground. I would be happy for you to share a link to this tutorial and one photo on your own blog. However, please do not copy the entire tutorial for free or for sale, and republish it as your own anywhere. Instead link back to this page for the instructions. Thank you for respecting my copyright and the amount of time and effort that has gone into creating this free tutorial.
I want you to know that this is the ONLY measurement that work properly!! I went through several tutorials and downloads before finding this. I cut (too small) squares to make QSTs for my king size quilt and then paid the price and ended up with small QSTs and then, too narrow seam allowance to save my fabric. Bummer.
THANK YOU for your tutorial.
Signed, a new quilter
I always add 1 inch rather than 7/8th of an inch. I then trim to correct size. My blocks are never too small.
I also add extra to each starting block. Better to have extra and then square up to correct size. Having too small a block causes more waste then trimming off some of the edges to get a perfect sized block.