A few week’s ago, I was inspired by Rachel’s Herringbone tutorial. I liked the look, but wanted to come up with something that used variable widths of scrappy strips, as that’s what I have in my stash.
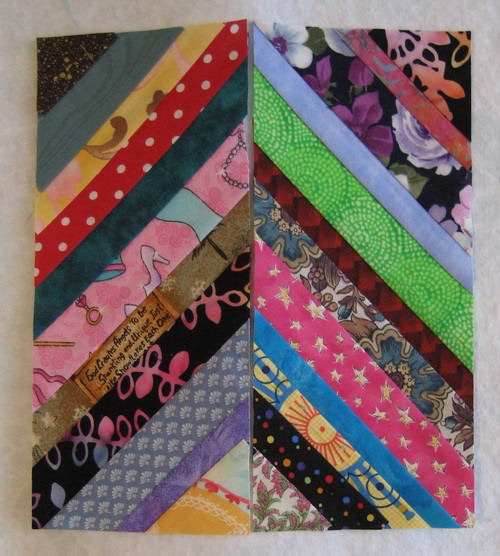
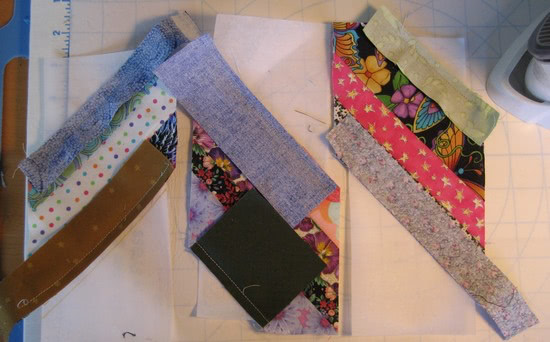
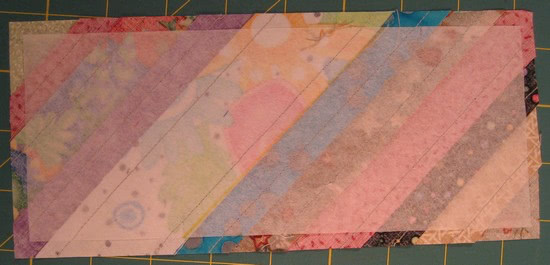
First, I tested the idea with two sections:
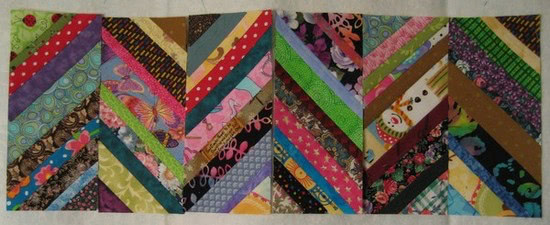
Liked it, so I continued to play and completed six sections:
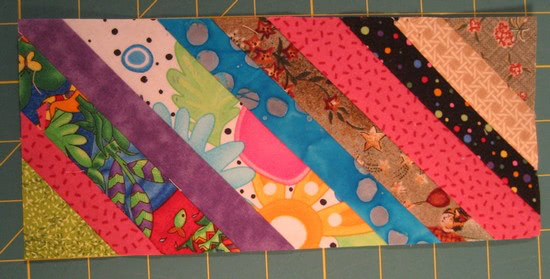
I took advantage of the long weekend and having graduated from dog school last week, to continue making sections last weekend. I’m up to 24 now:
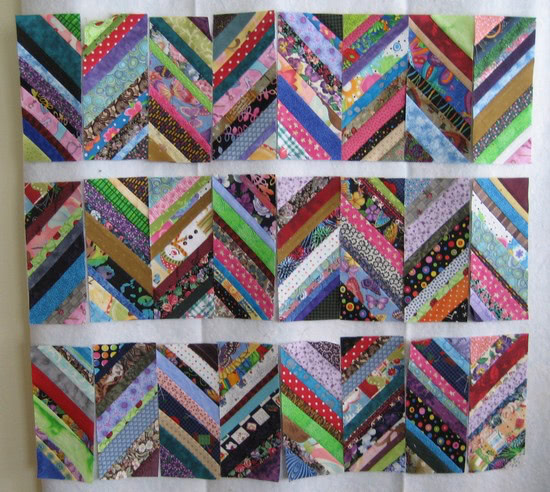
Each section measures 4″x9″ unfinished, so they’ll finish at 3.5″x8.5″ once sewn into the quilt top. I plan to use yellow sashing in between the rows. No idea right now how big this will grow. For now, I’m just enjoying the time getting reacquainted with my sewing machine and pretty fabrics.
I shared the photos on Facebook over the weekend, and several people asked me for the tutorial. Here’s how I’m doing mine.
Herringbone Tutorial:
I’m using June Tailor’s Perfect Piecing Foundation Sheets to stitch my strips onto.
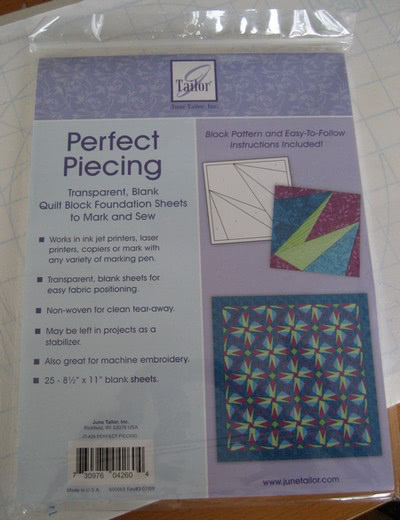
These are 8.5″x11″ non-woven sheets that can be used in a printer. However, my new printer doesn’t like them, so I was glad to find another use for them. The foundation can be torn away once sewn or left in. I’ll be leaving them in. This is my first time using them, so hopefully I won’t be disappointed with how the quilt drapes once washed.
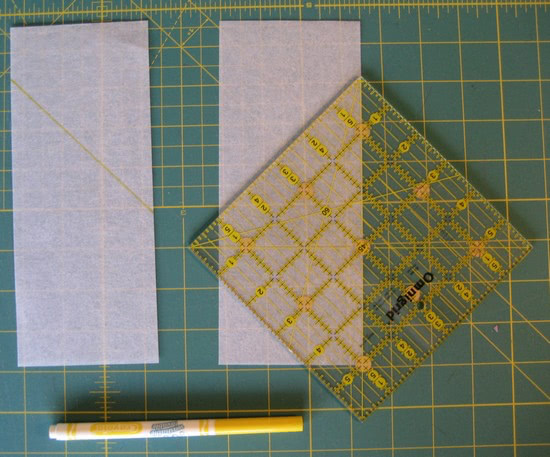
I cut each sheet into (3) 3.5″x8.5″ sections (with 0.5″ of waste). I used a Crayola washable marker to draw a 45 degree line on each foundation piece. For each pair, the lines drawn need to be mirrored, i.e. the lines go in opposite directions. I lined up the 45 degree line on my ruler with the edge of the foundation and drew the line.
Here’s how I set up my work area for this type of sewing:
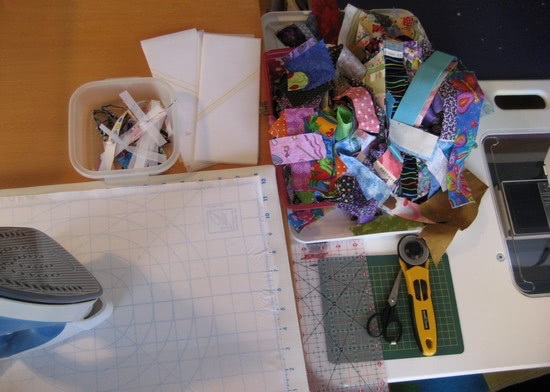
Left to right, iron and pressing board, plastic container for scraps, foundations, small basket (hard to see) containing small scraps, rest of the scraps on a container lid, scissors, rotary cuter, ruler and mini rotary mat.
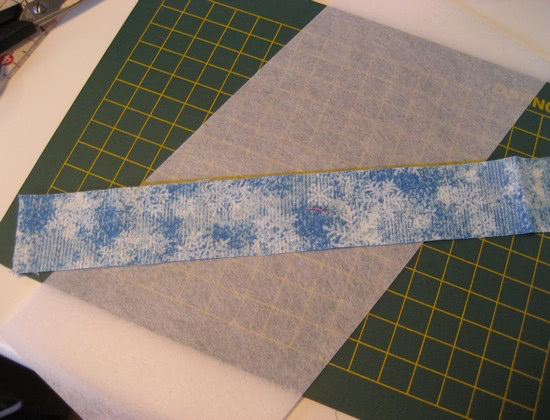
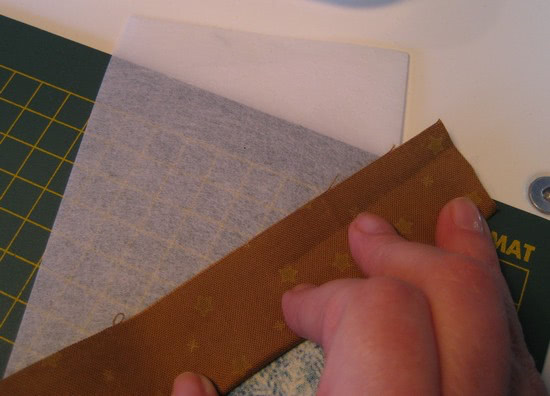
Let’s get sewing. Pick out a strip that’s any width, with right side up, align the raw edge with the line drawn on the foundation. Make sure you have at least 1/4″ on both sides beyond the foundation paper. I would suggest 1/2″ overhang on each side, but if the strip is a little shorter, it will still work at just 1/4″ overhang. You can trim the strip to size now or wait and trim the excess after you have sewn it to the foundation. Hard to tell from the photo, but I was using a piece that was ~30″ long.
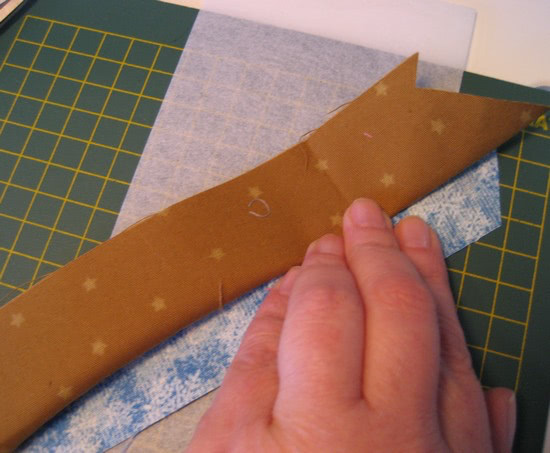
For each piece you add, it is placed with right side down, aligning the raw edges with the strip already on the foundation. To get it lined up correctly, you’ll flip it over before it’s sewn, guestimating at the seam allowance, to see if it fits. The strip shown below won’t work, as there’s not enough fabric to fully cover the section once it’s flipped to the right side (see top right corner). Don’t forget the 1/2″ (or so) overhang needed around each edge.
Pre-testing another strip to see if it fits, this one looks good.
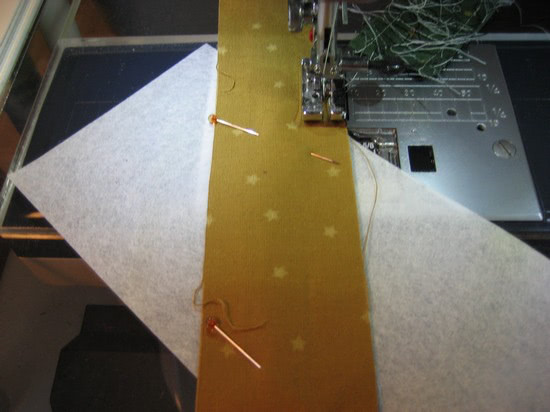
For the first two strips to be added to the foundation, I found it easier to pin them directly to the foundation. Sew with a 1/4″ seam allowance. Since I plan on leaving the foundations in the quilt, there was no need to shorten my stitch length as is usually done with paper piecing.
Press to set the seam, then press towards the strip last added. I like to roughly trim off the excess strip fabric as I go as I found the units more stable to work with.
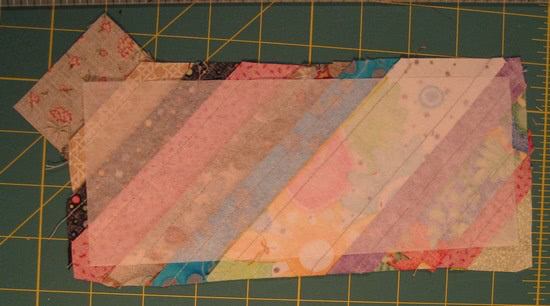
Keep adding strips of varying widths, colour and design until you completely cover the foundations. Here are the 18 I was working on at one time. Faster to piece them all, iron, trim, then back to the sewing machine for the next strip.
Once I got going, I started addinmg new strips to both sides of the foundation before going to the ironing board.
Here’s what the back of one completely covered unit looks like.
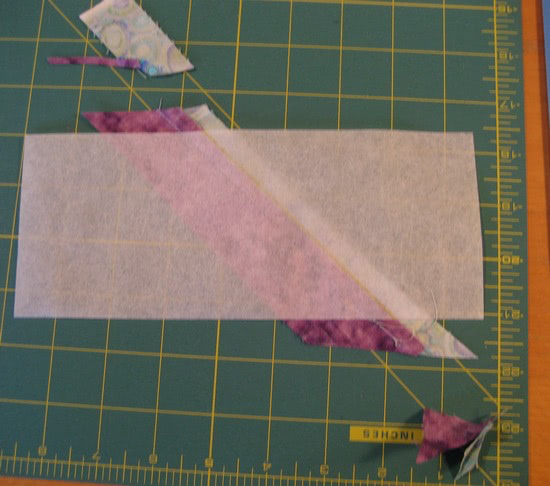
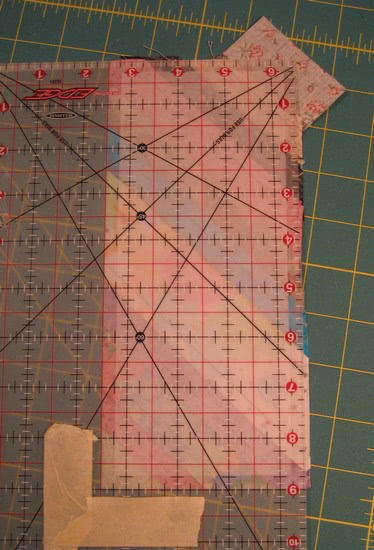
Grab your favourite ruler that measures at least 10″x5″. I find it’s always difficult to get good photos with a ruler. What I’m doing in the photo below, is aligning the top and right sides of the foundation at the 1/4″ line. I then trim the right and top sides at one time.
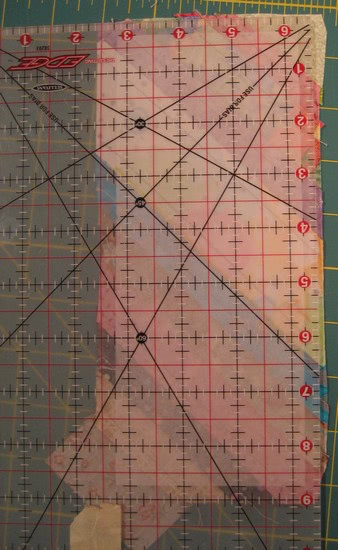
I turn my unit so that the just cut edges are now on the left and bottom, and use the lines on the ruler (not the foundation), to cut exactly at 4″ x 9″. I use the ruler lines, instead of the foundation, for the second cut, just in case the foundation is a little off, my units will be the exact size I want.
Here’s the back:
And the front:
If you have any questions, please don’t hesitate to ask in the comments section below. If you decide to make a quilt using this tutorial, please share it in the Flickr group or on our Facebook page, so I can see it too.

UPDATED: Don’t throw out those little bits… see what I did with a huge pile of small, otherwise useless, little bits for my Diagonals quilt:
Turning Little Bits into Usable Strips
UPDATED:
To answer Kitty’s question from the comments below, here’s a photo.
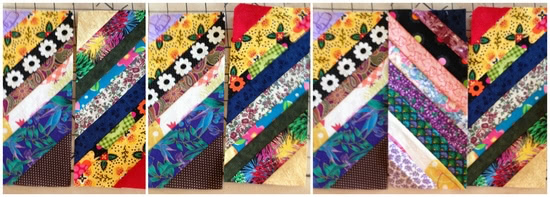
The image on the left is two blocks with the diagonal line sewn in the same direction. Middle picture is the block on the right from the first photo flipped upside down, you’ll see that the diagonal line remains in the same orientation. Last picture, is three block units, with the middle unit that has the diagonal sewn in the opposite direction as the blocks on either side of it (from the first two pictures).
Hope this helps!
Disclaimer: This free tutorial and all photos are copyright Michele Foster. I would be happy for you to share a link to this tutorial and one photo on your own blog. However, please do not copy the entire tutorial for free or for sale, and republish it as your own or anywhere else. Instead link back to this page for the instructions. Thank you for respecting my copyright and the amount of time and effort that has gone into creating this for others to enjoy.
Leave a Reply