Hi, I’m Barbara Wilson from the Thimble Pleasures (Chapel Hill, NC) blog "Hot Flashes". It’s great to be a Guest Blogger! Our shop’s blog gets lots of comments on anything to do with quilt studio design and organization. So, I thought I would share some of our ideas with you!
After years of quilting on the kitchen table and having to clean up every night, I had studio envy! So, I took the plunge and decided to convert a bedroom into a quilting studio. It’s not a large space and I quickly realized that I needed a plan to be certain I could do all my quilting in one room and stay within my budget. I read books about studio organization and visited friends’ studios to learn more.
This was my initial wish list for my studio:
- A design wall
- A sewing table with extension table to support my quilts
- A cutting table
- Project and fabric storage
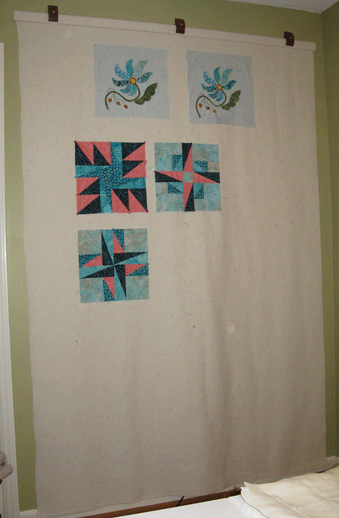
Design Wall: The design wall was a challenge. I didn’t want to damage the walls by gluing foam insulation board to the wall, so I hung quilt batting from quilt clips – and Voila! A great design wall! I glued the batting to a small piece of wood and attached it to the wall with quilt clips. When I need the room to look really nice for guests, I just take the batting down and put a quilt in its place!
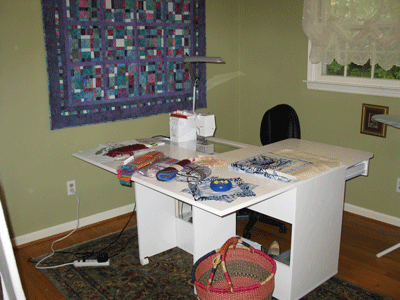
Sewing Table: The sewing table was the most costly piece of the studio. I looked and looked for the style and color I wanted and finally found one that met my needs. The extension behind the sewing machine folds down when I need to close the table (which I have NEVER done, by the way). The drawer to the left of the machine area also has a table insert that provides lots of support to my quilts as they grow in size. The machine is mounted on a spring-adjusted platform, so the table can be closed without moving the sewing machine – haven’t ever done that, either!
Cutting Table: The room is not very big and I needed something tall enough to cut fabric comfortably, but not so big that it took up a lot of space. I used an inexpensive Ikea student desk with an adjustable height desk top! It also has adjustable book shelves for storage – love it! I added a task light to brighten the cutting area and a template holder, so that all my cutting tools were in one place. No more running up and downstairs to the kitchen counter top to cut fabric or trim blocks.
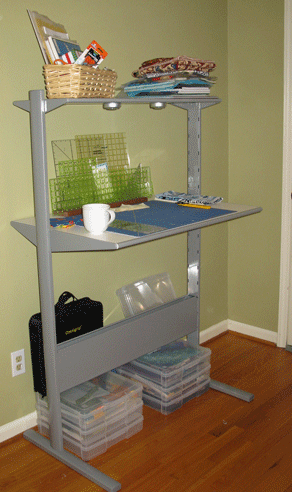
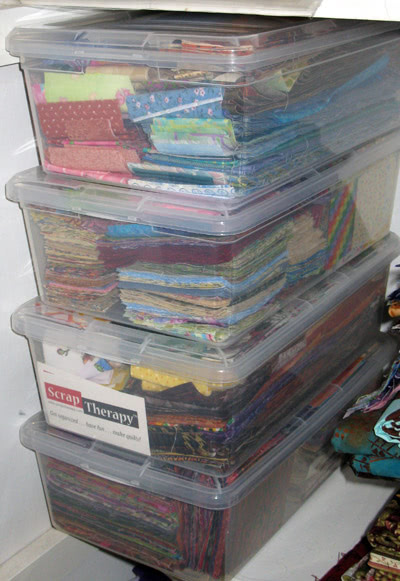
Storage: I put my unfinished projects in individual scrap booking boxes and stack them on the floor under the cutting table. They are neatly put away, but visible to remind me how many I actually have! Fabric storage – the last frontier! There are two closets in my studio, one with shelves top to bottom. Most of my fabric is stored in that closet, organized by project or fabric type, not color! There is a batik shelf, children’s fabric shelf, holiday (Christmas, Fall, and Halloween), and the "the rest", comprised of various fabric collections for quilts I have planned. My scraps are organized in Scrap Therapy boxes by shape (5, 3.5, and 2 inch squares and 2.5 inch strips) and light/darks.
My storage is still a work in progress, but here are some additional storage suggestions:
- Use see through containers like plastic jars and bins, glass canisters, and wire baskets to keep everything from beads to fabric contained, yet in plain sight for inspiration and easy access.
- Label your containers. You can invest in a label maker or use stick-on labels. If you use a cabinet with drawers, paint the drawer fronts in blackboard paint and write your labels in chalk!
- Re-purpose bookshelves or buy new. Try to use units with adjustable shelves so you can change the heights to suit your needs (and containers) over time.
- Color coordinate? Most quilters find it easiest to locate the right fabrics, threads, dyes, and embellishments when they sort and store these supplies by color. Plus, organizing anything by color makes it look more orderly. I’m not there yet, but my friend Sharyn is!
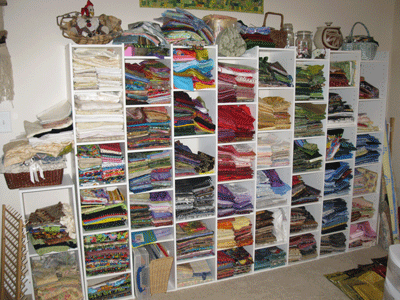
- Re-purpose. Organize your supplies in household items meant for another purpose. Put marking pens in colorful mugs, paint bottles in spice racks, or buttons in tiered candy dishes. I use a fabric shoe holder that hangs in my closet to store UFOs. I also use freezer zip lock bags to store projects, quilt pieces, appliqué motifs. I like baskets for storage, there are so many pretty ones to chose from these days!
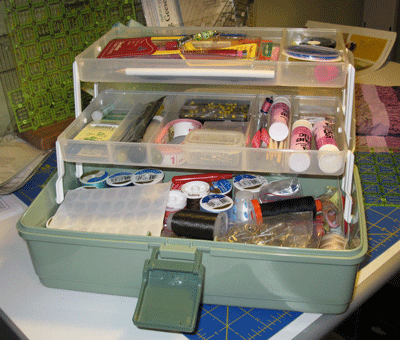
- I made a "quilt tackle box" to hold all my quilting tools and essentials for quilt class. I keep thread, needles, pencils, glue sticks, pins, measuring tape etc. in the tackle box. Now everything is in one place and I just grab it and go!
- Clean up. If you pick up your studio between projects, it will be easier to find things. (Yes, I know…..) At the end of a project, I cut my scrap fabric into the Scrap Therapy sized pieces and store in boxes (above), this saves space and time! It pays off later when you are making a scrap quilt.
I recently added a laptop computer and ink jet printer for making quilt labels to my studio. I also keep my digital camera in the studio, so I can take photos of all my projects. Wireless Internet allows me to take online quilt classes, write the blog, and post my quilts on Facebook for my friends to see from my studio!
So, if you have studio envy, I encourage each of you to take the plunge and create your own studio! You deserve it! It doesn’t have to be fancy, or big, it just needs to be YOURS!
Happy quilting!
Barbara Wilson
www.Thimblepleasures.com
Chapel Hill, North Carolina
Great sewing room, thanks for sharing!
.-= Anna’s latest post: Kreativ Blogger award =-.
always enjoy seeing how others organize their quilty stuff. gives the rest of us ideas on how to set up things to make it more conducive to busting those UFOs and just plain enjoyquilting
Great ideas for utilizing space, especially the design wall and I love the cutting area idea.
You should share your cutting area idea with the ikea hacker blog at http://ikeahacker.blogspot.com/ They’re always looking for new ideas.
i could barely cross stitch let along quilt!!
How long would you say it takes to make a quilt from start to finish? My wife is looking to get into but she is not really sure where to start.
Hi Jason,
Every quilt is different. I would suggest she contact her local quilt shop and look into taking a beginner course with them. She’ll be glad she did to learn some of the basics quickly.
Cheers,
Michele
I am having the problem with storage issues. I organize my fabric by color and fabric type.