
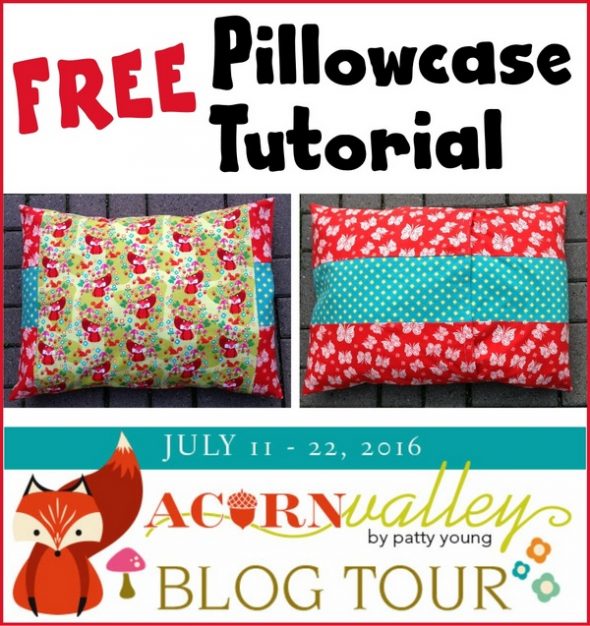
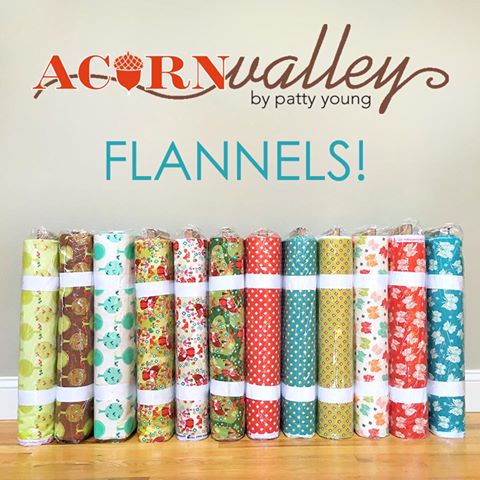
Good morning everyone! I’m excited to participate in the Acorn Valley Blog Tour featuring these gorgeous flannels designed by Patty Young for Riley Blake.

I love, love, love flannel pillowcases. I use them all year round. I also detest when my pillow falls out of its case, so my tutorial here shows you how to make an envelope-style pillowcase.
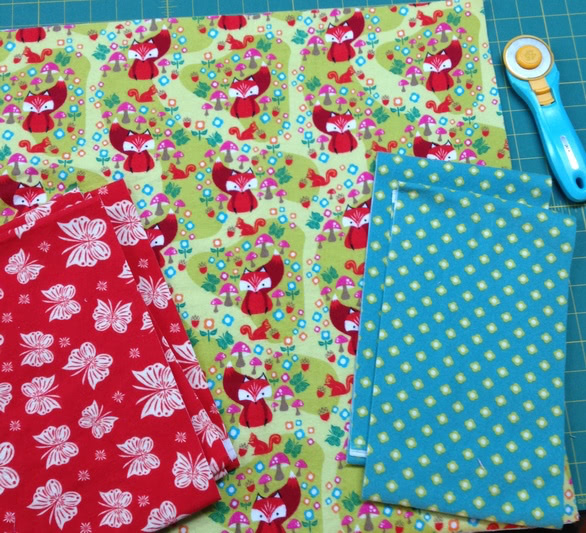
First step, measure your pillow. I have queen-sized pillows that measure 19″ tall x 24″ wide. Add some seam allowance, I like to use 1/2″ seams for this type of project. So, my height measurement becomes 20″. I wanted to feature the fox print on the front, with the coordinating fabric on the side and back. That meant to my 24″ wide, I added 6″ for overlap, 6″ for the sides of the front and 1″ for the seam allowance. That came out to 38″, since fabric is generally 40″ wide, I just cut my strips by width of fabric.
Here are the exact measurements for my queen-sized pillow:
20″ square of focus fabric (foxes)
2 strips at 7.5″ by width of fabric (red butterflies)
1 strip at 6.5″ by width of fabric (blue flowers)
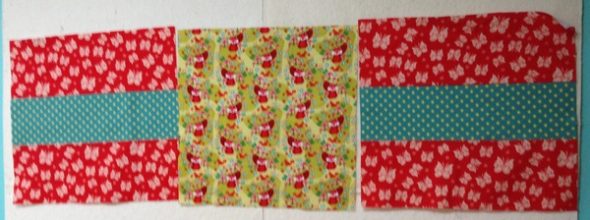
Shown below are my cut pieces to make two matching pillowcases.
I used my serger for this project. If you don’t have a serger, you can use a regular sewing machine, and then use pinking shears or a zigzag stitch to finish your exposed seams. Remember, 1/2″ seam allowance used throughout.
First stitch the three coordinating pieces right sides together, red, blue, red, in my case. If you are using a directional fabric, like I am, be mindful to have the pieces orientated in the same direction.
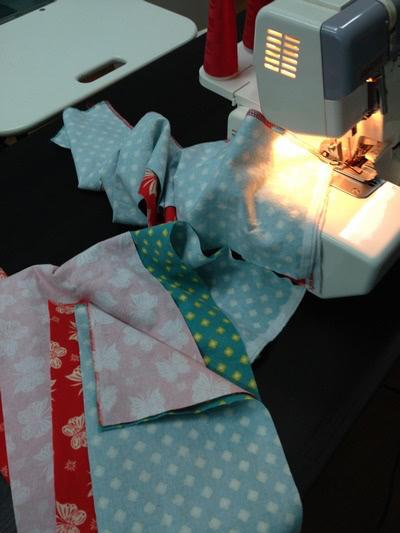
These will measure 20″ x ~40″ width of fabric.
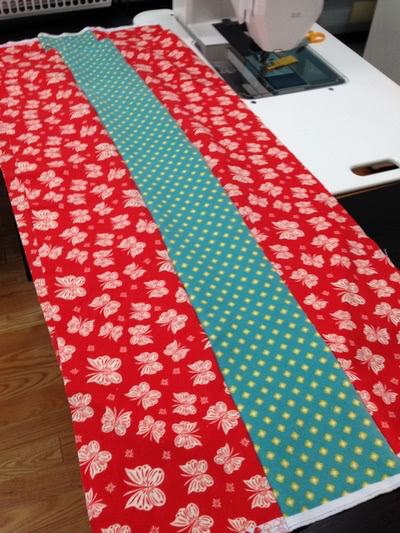
Press the seams flat towards the outside fabric, i.e. the red butterflies. Next fold the long pieces in half on the short edge, and remove the selvages.
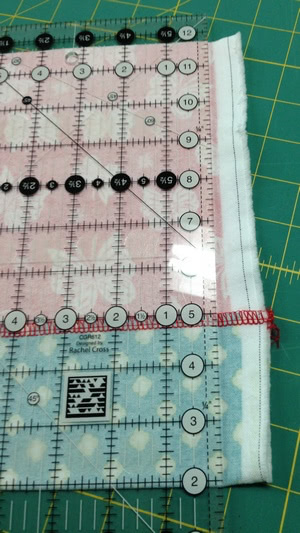
Unfold the strip and refold in half on the length. Find the centre and cut the strips in half. Mine measured approximately 20″ tall by 21″ wide. Layout your two pieces on each side of your focus print, making sure that if you have directional prints, the units are in the correct orientation. (Sorry for the blurry photo!)
Stitch the side pieces to the centre square. Next, hem the two ends. First fold over a 1″ hem, then fold that again. Stitch two lines to secure in place.

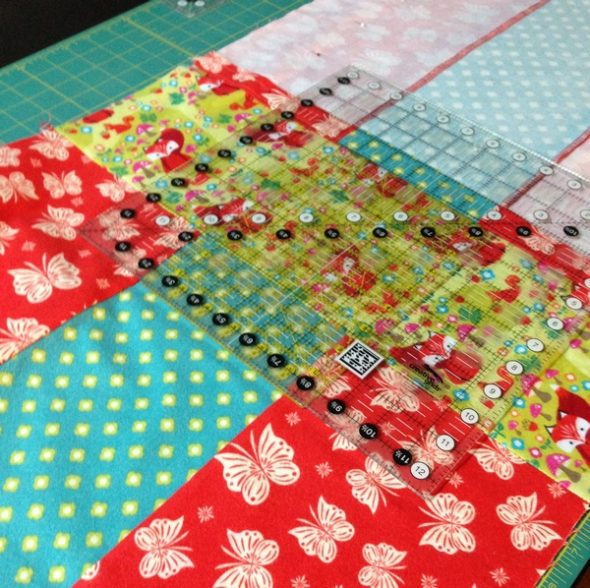
Yeah, we’re almost done. To finish up, lay your piece on your table right side up. Since my pillows are 24″ wide, I used my 24″ ruler, to centre the fox print in the middle (super easy). If your measurements are different, you’ll just want to determine what the measurement should be, and centre the middle print, with an equal amount of coordinating fabric shown on both sides.

I then used a larger ruler to help keep everything straight and folded the edges over, so that the fabric is right sides together and overlapping.

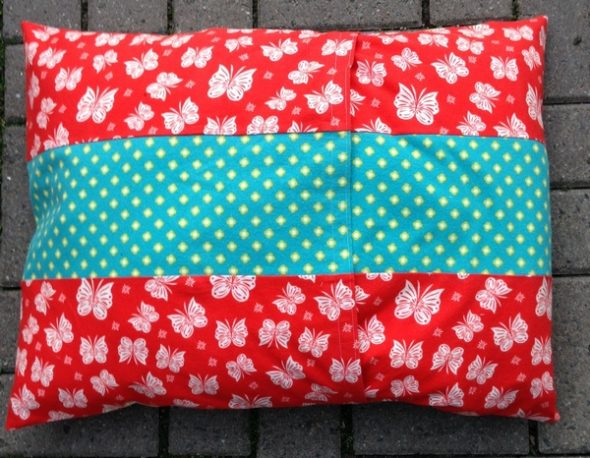
Pin the layers together, and serge the final two edges. Turn your pillowcase right sides out, and give it a press. Stuff your pillow inside.

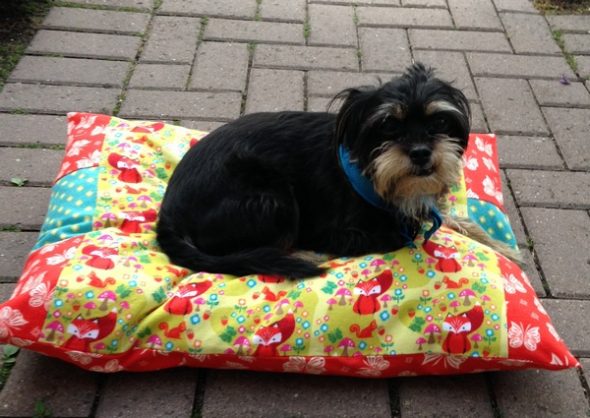
Milo approved!
Let me know if you have any questions. If you make some pillowcases, please share in my Facebook Group, I’d love to see them. Plus, be sure to download my 5 Free Quilt Block Tutorials over on my pattern site.
Blog Tour
Visit the other Acorn Valley Blog tour participants to see what lovely projects they made:
Tuesday 7/12: Sweeter Than Cupcakes & That’s Sew Kari
Wednesday 7/13: Beri Bee Design & Falafel and the Bee
Thursday 7/14: Sew and Tell Project & Handmade Martini
Friday 7/15: Coral & Co. & Pear Berry Lane
Monday 7/18: Sweet KM & 2 Little Hooligans
Tuesday 7/19: Highered Hands & Sue O’Very Designs
Wednesday 7/20: Smashed Peas and Carrots & Gingham Girls
Thursday 7/21: Flamingo Toes & Quilting Gallery – that’s ME!
Friday 7/22: Ameroonie Designs
Giveaway and Coupon Code
Patty is giving away a box of 1 yard cuts of Acorn Valley flannels.
Enter below:
Plus use coupon code AcornValley2016 to get 25% off your entire purchase in the Modkid Etsy Store. Valid July 11th through July 22nd at midnight EST.
Such a fantastic giveaway. These flannels are in some of my fave colors too!!! Thank you
I love that there is a chance to win these lovely flannels. Lovely colors.
Love the pillow cases! The flannels would make an awesome pillow case!
Oh my goodness, this giveaway is awesome!!! I could make pillowcases for everyone in my family!!!
I just finished making my first flannel quilt. I think some flannel pillow cases will be the perfect finishing touch :-)
I love the pillow case pattern! Can’t wait to try it. Thank you for the opportunity to win some flannels.
Love the flannels. Grandkids will be getting some new pillow covers! I really liked your tutorial it is easy to follow!
Thanks!
This is great love, love the pillowcase. Going to do this as gifts Christmas is coming. Thanks