
The Aiming for Accuracy quilt-along (QAL) was held in the Summer/early Fall of 2013. The lessons, blocks and detailed photo tutorials have been removed from this site and are now available for sale as a complete booklet.
Find out more about it here: Aiming for Accuracy Booklet.

Welcome everyone to Lesson 4 for the Aiming for Accuracy Quilt-Along (A4AQAL).
If you’re new here, check out the main QAL page where you’ll find all the information so that you can join us on this QAL adventure.
We have weekly prizes that everyone can enter. Amy Gay of Butterfly Angels Quilting has volunteered to be Prize Coordinator and will be communicating with the winners and sponsors. For the first 12 weekly lessons, we have five or six prizes to give-away each week.
To enter the weekly give-aways: Each Saturday, there will be a blog post available on the Quilting Gallery site, where you will upload your completed photo for that week’s lesson. Check the main QAL page for the link. You’ll have until the following Friday evening to enter. Amy will be randomly choosing the week’s winners on Saturday morning.
For those that have completed Lesson 3, submit your photos here before midnight on Friday (tomorrow) (EDT).
We are chatting up a storm in our Facebook Group and you can also share photos in our Flickr Group.
Please note: Even if you share your completed photos on other social media sites or your own blog, to be eligible to win one of the give-aways, you still need to upload the photo on this site.
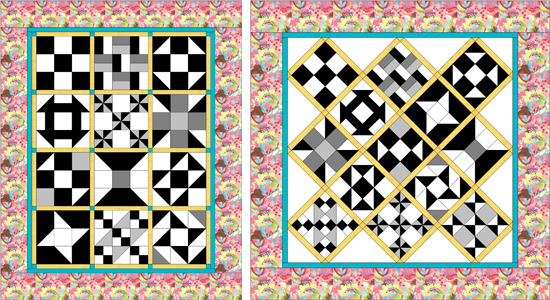
Breezy Beginner’s Sampler Quilt
Before I get to today’s lesson, I’m so excited to announce that the Breezy Beginner’s Sampler Quilt Booklet is now done! It’s 70 pages and contains beginner’s lessons & tips and 13 block tutorials, as well as, the instructions for completing both the standard and on-point layouts.
Intro Bonus: From now until Sunday, use code Breezy when you check out to save 20%. Purchases help me pay the rent and keep Milo in doggy treats.

More info here: Breezy Beginner’s Sampler Quilt
Quilting Accuracy: Triangle Points
This week’s Aiming for Accuracy lesson deals with triangle points and is best show with several photos.
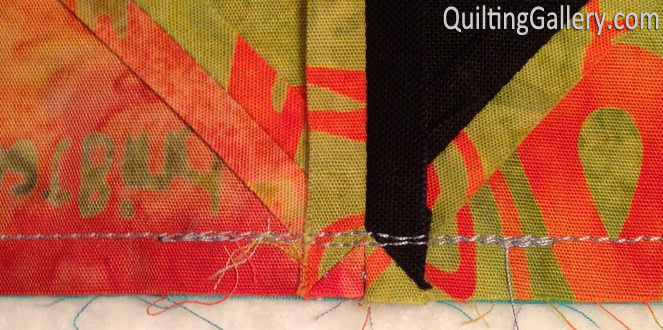
In this photo, notice that the stitching line is right above/touching the top of the little triangle units formed in the seam allowance. This is what we aim to achieve.
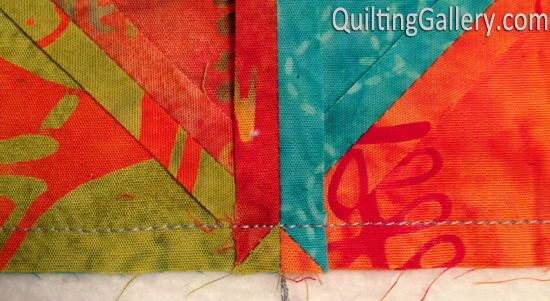
From the front:
If you’re pressing your seams to one side, then you stitch directly through the X formed by the triangle unit and side seam as shown in the photo below

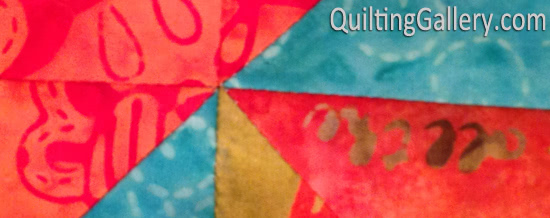
Compare with this photo, where it’s obvious that the stitching line is too narrow and didn’t hit the top of those little triangles.
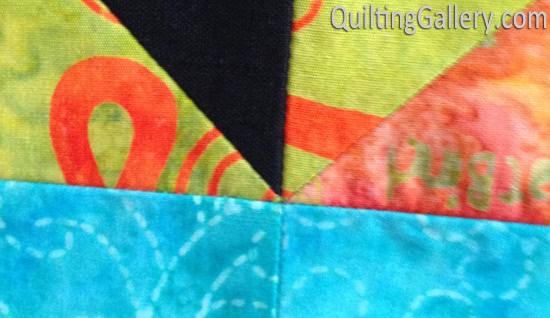
From the front, there’s a noticeable gap:

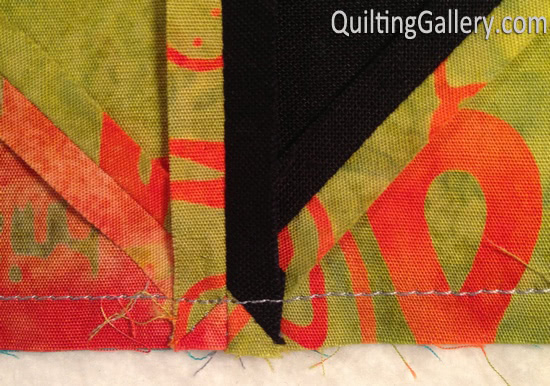
To correct this problem, re-stitch just the section of the seam needed being sure to back stitch at the beginning and end. There’s no need to remove the other stitching line in this case.
From the front, it’s better and I would accept this as close enough. Once the quilt top is quilted and washed, that little tiny gap on the left side won’t be noticeable.
When attaching the sashing strips to the completed blocks, we sew with the sashing on top, which makes it impossible to see where the triangles are on the block. This photo shows what I do. I stick a pin directly into the seam at the edge of the triangle, where I want to sew, and through the sashing strip.
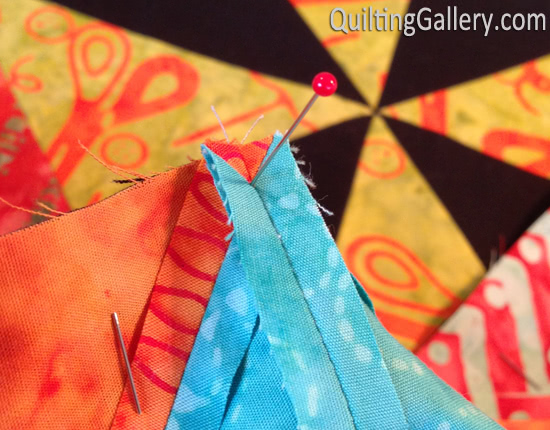
On the sashing strip, I’ll then mark exactly where that pin came through. Before doing this, make sure that your sashing strip is firmly secure to your block, as there’s no point in marking where to sew if you move the sashing strip after.

For additional information, check out these Pinning Tips from McCall’s. They provide a PDF file that you can download too. I really like the double triangle idea.
Disclaimer: This quilt design, tutorial and all photos are copyright Michele Foster of Mishka’s Playground. Please respect my copyright and do not copy this tutorial or republish it, for free or for sale, in print or online. You may use this tutorial to create quilts for your own personal use for free or for sale. However, please credit Michele Foster of Mishka’s Playground for the design. No mass production is allowed.
Your dog is adorable! It’s gonna take me a little longer to absorb the triangle directions.. Thanks
Thanks a lot for This Quilt along, I’m having such a fun!
This one was a little tricky but after using Mr riper some times, I finally got it.