
I’m thrilled with the response so far to the Sandy Quilt Block Drive. All of the volunteers are amazing. Thank you!!
Please read this tutorial carefully. There are instructions for both block makers and team leaders. Block makers will send the over-sized (UN-trimmed) blocks AND a 5″ square (unfinished) label to their team leaders.
For Block Makers: Wonky Scrappy Log Cabin Tutorial
This is an easy, FUN and addictive block to put together.
Requirements: You’ll need a wide assortment of 100% cotton, scrappy strips in different sizes ranging from 0.75″ to 2″. For each pair of blocks that you make, you’ll also need three (3) 2″ strips by width of fabric (i.e. 40″) of a dark solid for the outer border. This can be black, dark grey, brown, navy, etc. The darker colour helps the inside colours really pop. I strongly suggest that your dark, outer fabric be pre-washed, just in case it runs!
Gather your supplies and set up your work area so that you’re comfortable:
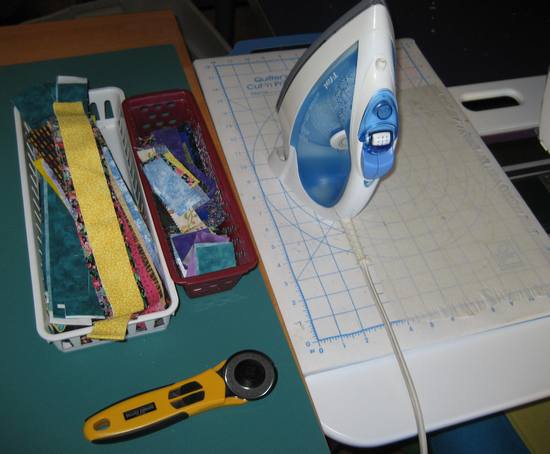
A sleeping side-kick is optional:

Start with two small scraps, approximately 1.5″. Stitch them right sides together. Stitching these blocks is a great opportunity to use up almost empty bobbins and thread spools too. I emptied four bobbins working on two blocks.
Once stitched, set the seam and press towards one of the blocks. If needed square up one side and add another piece. It doesn’t have to be an exact length, as you’ll trim the edge before adding another piece.
Trim the next side, and add another strip. You’re always adding a new strip on the side that has three fabrics on the edge. Press seams towards each new strip that you add.

If you have a really skinny piece and want more of it to show, you can off-set it a little when you attach the next strip.

Making progress:
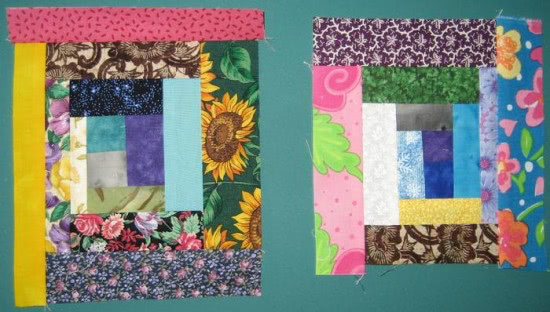
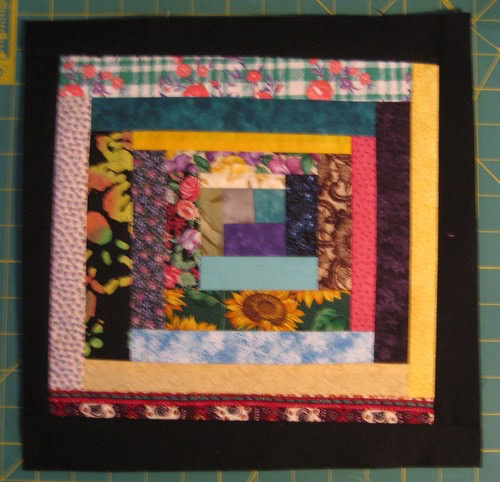
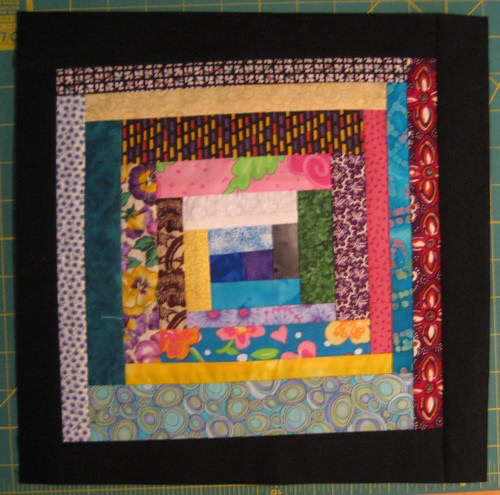
Continue adding strips until your blocks are approximately 10.5″ to 11.5″.
For the final row, add a 2″ dark border on each side. You’ll trim-as-you-go to the required length the 2″ by width of fabric strips that I mentioned in the requirements above. You’ll probably only get three sides of a block completed with one strip length (that’s why I indicated above to cut 3 strips to make two blocks, 3 strips will cover 9 sides, you need 8 for two blocks).
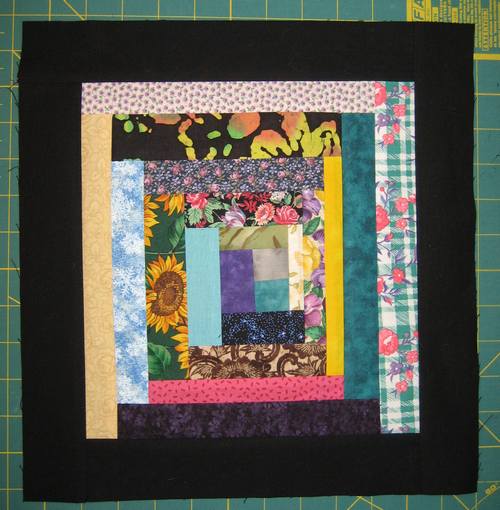
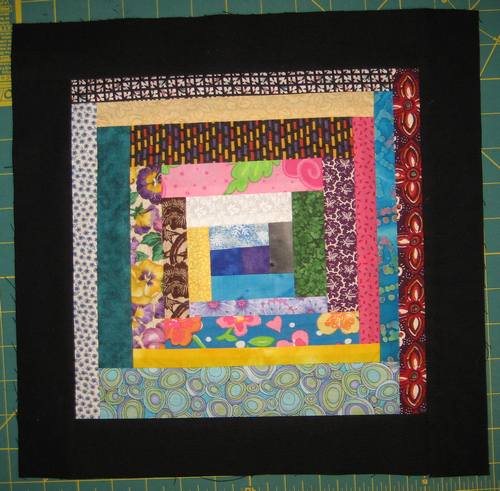
Your blocks should finish at approximately 13″ to 14.5″. Don’t trim your blocks! You’ll be sending these over-sized blocks to your team leaders who will do the trimming. The WONKY part of the pattern comes from the trimming of the black fabric.
For Block Makers: 5″ Square Label
You’ll be sending one 5″ square (unfinished size) label to your team leader. If you’ve signed up more than once and received more than one team leader, please make a label for each team that you’ve been assigned to.
The ONLY requirement for your label is that it be 5″ square, includes your name and location and an optional message of hope. Your label can be just a solid piece of fabric. You can embroider your information with a simple backstitch or use a fabric-safe, permanent marker to write your info. If writing your details, it’s most helpful to starch the fabric a few times to make it stiffer and easier to write on.
Below are some ideas for making your label. (I’ve received so many emails about this!) These are ideas only, you be creative and do what you like as long as what you send to your team leader is 5″ square.
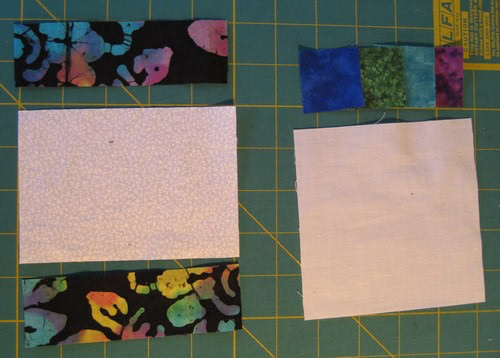
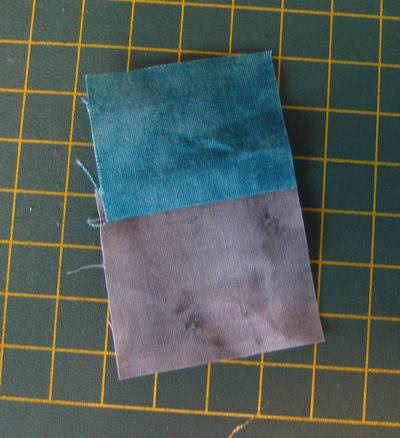
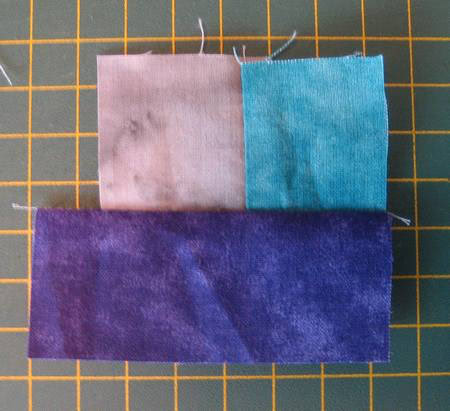
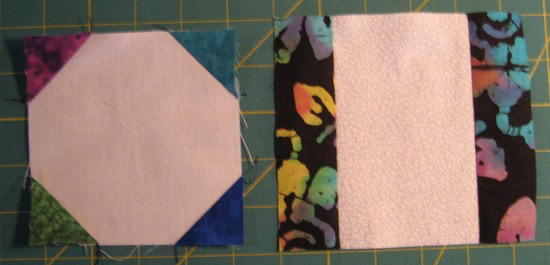
The above photo shows the fabric requirements for two different labels: on the right is Sidebar and on the left Snowball.
Sidebar Label: white centre fabric is 3.5″ x 5″, both outer fabrics are 1.5″ x 5″. Attach the outer fabrics to the white centre, pressing towards the outer fabrics.
Snowball Label: white centre fabric is 5″ square, four small contrasting fabrics are each 1.5″ square. With the small squares, draw a diagonal line from one corner to the other. Position on top of the white fabric, right sides together. Be sure to get the drawn line in the correct location. Stitch directly ON the drawn line. Set your seams, then trim the corner 1/4″ away from sewn line. Press towards the small square.
Completed labels (yes, my snowball label is a little smaller, I cut the white incorrectly and don’t have time to redo it right now).
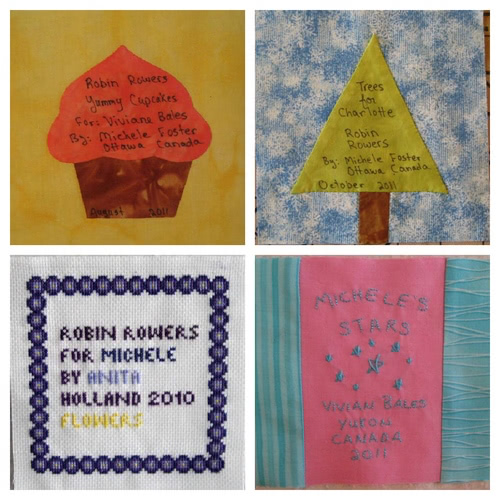
Below are some additional label ideas made during the Robin Rowers project I participated in with quilting friends around the world. The top two I created, the bottom left was done by Anita and the bottom right by Vivian.
For Team Leaders: Trimming the Blocks
Block Makers The instructions below are for team leaders only. Please DO NOT trim your blocks.
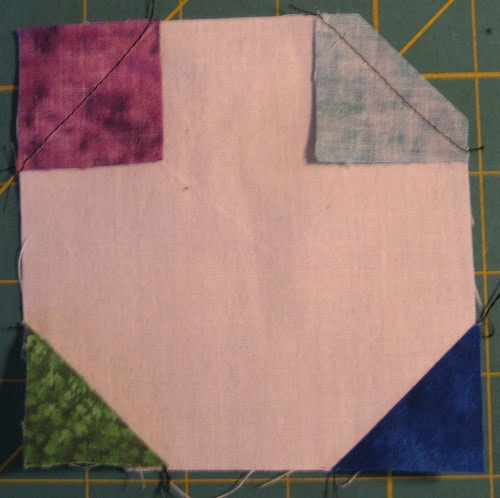
The blocks you receive will be over-sized and need to be trimmed to 12.5″ square before you assemble them into the quilt tops. It’s up to you if you want to decide on the quilt layout before trimming or trim all the blocks then decide on the layout. I trimmed mine first.
You’ll need a 12.5″ square ruler. Lay the ruler on top of the block at a slight angle so that the dark fabric on the edge extends on all four sides of the ruler. The more available dark fabric you have, the more wonky of an angle you can make. Make sure you have a good 1/2″ in the corners of the dark fabric still available on your block. Remember, you’ll need 1/4″ of the dark fabric for seam allowance.
Step 1: I’ve decided on my angle, now I’ll cut the right side and the top at the same time before I move my ruler. If you’re left handed you’ll probably cut the left side and the top first.
Step 2: Rotate the block so that the cut edges you just made are on the left and bottom sides. Place your ruler so that the left/bottom edges are aligned with the cut edges you did in Step 1. Cut the right and top sides to finish the 12.5″ square.

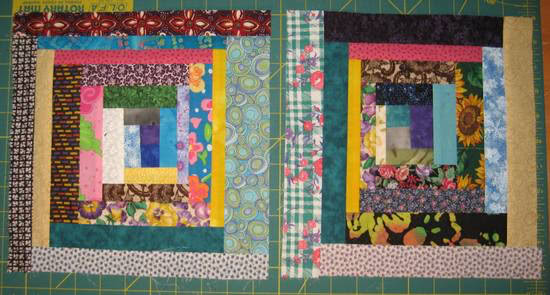
My first trimmed block, it’s now 12.5″ unfinished ready to be sewn into the top:
My second trimmed block is below. You’ll notice that the wonky isn’t as well defined as the first block, as I didn’t have as much black fabric to work with:
Both blocks work just fine, you’ll want to vary the degrees of wonky for your blocks. I found it much easier to trim the blocks first, then decide on the quilt layout. It meant I wasn’t stressing out trying to decide how each block should be cut ahead of time. You do what works best for you.
Here’s my two blocks sewn together … now we can see the lovely wonky!

Tips:
- I found it most helpful to give the blocks a spray with Best Press (or other fabric starch) and a REALLY good press before trimming.
- If you have blocks that are smaller than 12.5″ already, you’ll have to add additional dark fabric to two sides before cutting. You’ll need them to be 12.5″.
- If you have blocks where the dark fabric is too narrow, you could unpick them or just trim to 12.5″ and piece them next to another block with more black. The design will still work.
- Similar to the above tip, if you can’t get a full 1/2″ of dark on a side, you’ll just have more bulk in the seam to deal with. It still works, it just makes that corner a little more fragile.
Team Leaders: Don’t forget to include your OWN label on the back too. You decide how you want to incorporate the labels into the quilt backing.
To volunteer to make blocks or assemble the quilts, go here: Sandy Quilt Block Drive

Leave a Reply