Hi everyone! It’s Michele here for today’s Learning Center post with info on some basic quilting tools to get you started, a few reference books, a couple of inexpensive tool ideas and links to standard quilt sizes. As we explore the various techniques of quilting in upcoming posts this year, we’ll share tools and recommendations specifically related to those types of quilting.
Later this month, I’m also putting together a blog post with reader recommendations for “not so basic tools”. I’ve received several great ideas already. If you have a tool that you’d like to recommend, send me an email, a photo of the tool and/or a link to where it can be purchased and a couple of sentences why you like the tool. Don’t forget to include your name and a link to your own blog, if you have one.
Photos included below are for illustration purposes and not meant to represent me recommending one brand over another. That’s not the purpose of this post.
Basic Quilting Tools
Let’s face it, quilting can be expensive. If you’re just starting out it’ll be overwhelming the huge number of products available to us. Remember quilters of previous generations had a very small selection of tools and they produced such beautiful results. Some lovely fabric scraps, needle, thread, cardboard templates and scissors is all they had in their day.
Start small and build up your collection of tools as you need them. Buy the best quality you can afford at the time. Go to quilt shows to see the latest tools available and to try them out before buying. I try to avoid impulse buying and instead will watch a tool demo, walk away, and if I’m still thinking about it later, it’s time to back to the booth and get it. :)
Here’s what the quilter of our time will want in his/her toolbox:
- Rotary cutter – the best time saving tool ever created
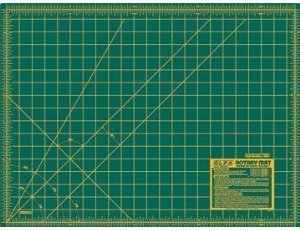
- Self-healing cutting mat – must have to use the cutter
- Rulers – to use with the above
- Scissors
- Seam ripper – yes unsewing is a part of the quilter’s life
- Gorgeous fabric, threads, needles, sewing machine and an iron
The last item on my list we’ll explore later in March and April.
Rotary Cutters
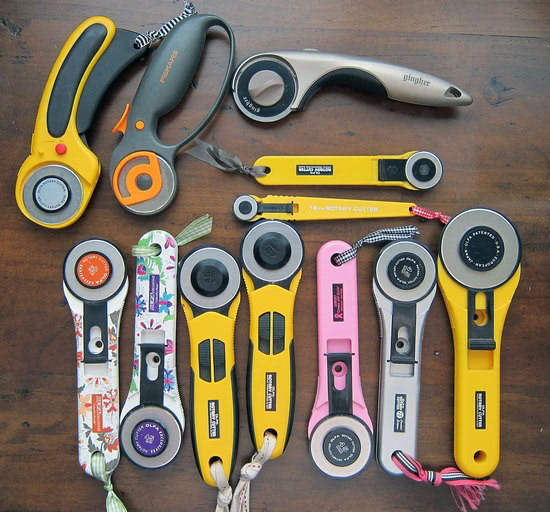
I had a funny email exchange with Carrie Nelson last month when she shared with us her studio organization tips. She said …
I called her the Queen of rotary cutters and asked her to send me a photo of her stash of cutters. Here’s what she had to say …
Please tell me you know how it is… even though it is a style or configuration you don’t use, no self-respecting quilter would get rid of a rotary cutter that still works! If nothing else, it might yield the last almost-sharp blade in the house! So I have the old ones I used all the time… all the collector Olfa’s that I either bought or was given… and then the quick-change cutters that are my favorite. I love those because of the shape of the handle ~ so comfortable.
By the way, you’ll probably notice that I tie ribbons to my rotary cutters. Just whatever is handy. I started doing that eons ago when I would take tools to class as a quick way to identify my rotary cutter in a sea of similar tools. I got used to seeing it so they look kind of nekkid when they don’t have a ribbon… but I’ve also found that the ribbon often makes the cutter easier to spot when it is under/partially covered by fabric or other stuff. So when the ribbon gets a little old and ratty-looking, I just switch it out without something new.
Rotary cutters come in several different sizes (18mm, 28mm, 45mm and 60mm), shapes, colours and configurations. Many companies make cutters including Olfa, Fiskars, Clover, June Tailor, Gingher and others. Some like the Grace Company make cutters that are meant to be more ergonomic and less stressful on the body, such as this one, My Comfort Cutter:

For the beginner, I’d suggest getting the 45mm one, it’s the one you’ll use the most. If you can, try them out at a quilt store or show to pick one that feels nice in your hand. Cutters have come a long way over the years. In my stash, I have three cutters: two 45mm ones an old style and a newer style and a 28mm one. The old 45mm one is used strictly for batting or paper and always has a dull blade that I’ve transferred from the fabric cutting one. Don’t forget to pick up a pack of extra blades.
If you’re left-handed, you’ll definitely want to try out the cutter you’re thinking to buy or be sure to purchase one that states is if for left-handed users, such as this one from Olfa:
Self-healing Cutting Mats
Like rotary cutters, cutting mats come in a wide variety of styles, configurations and sizes. The most important thing to remember when buying a cutting mat is to purchase one that is “self-healing”. I made the mistake when I first started out of getting one that wasn’t and it didn’t last long at all.
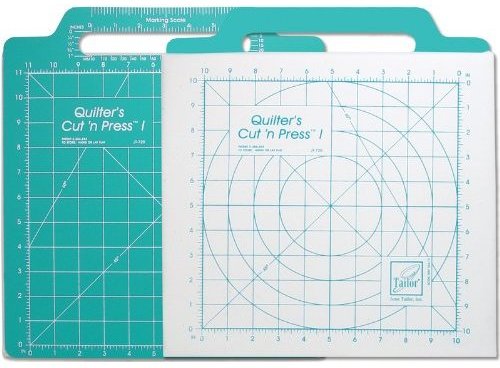
What size you choose will also depend on how much space you have available in your sewing room. I have two 24″x36″ mats (one for batting/paper only), a rotating mat (shown below), a mat ironing board combo (also shown) and a couple of tiny ones that are handy beside my sewing machine when paper-piecing. I covet one of the larger mats if only I had the space for one.
Rulers
To go with your newly acquired mat and rotary cutter, you’ll need some rulers. Once again there are numerous companies that make rulers and many fabulous speciality rulers too. Best advice I can give when purchasing a ruler is to make sure that you can easily read the lines on the ruler. I have purchased a few that are impossible to read on any fabric colour. For the beginner, I’d suggest three basic sizes: 6.5″ square, 12″ square and a 6.5″x24.5″ long ruler.
Shown above is the 12.5″ square The Cutting Edge ruler that Pat Sloan designed and was developed by Sullivans. We’re giving away two 6.5″x24.5” rulers, see below for details.
Scissors
Even with a rotary cutter, you’ll still need some scissors. There are many to choose from and specialty scissors galore. Buy what you can afford for the task you are doing. I’d recommend a good pair for cutting fabrics, a pair for cutting paper, and a small pair for cutting threads.
I’m not sure how many I own, but I do have a nice collection. :) I found this Scissors Challenge on Flickr, and was surprised to see that it was something Pat did a couple of years ago. Yes, my collection is similar to these!
1. From Elise Fare, 2. IMG_1822, 3. IMG_1807, 4. scissors collection, 5. 43 Pairs of Scissors, 6. DSCN6995, 7. My Scissors, 8. A flower from Scissors, 9. my scissors collection
Seam Ripper
The seam ripper will be your best friend. Choose a good quality one with a small point at the end. You’ll be thankful for it.
Reference Books
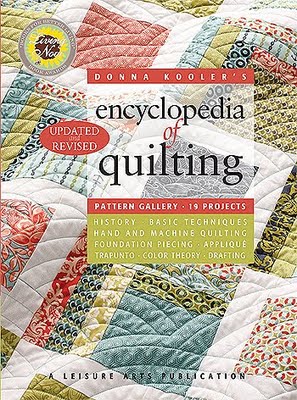
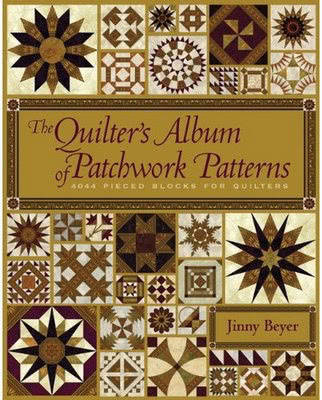
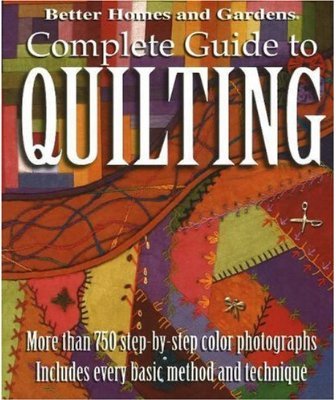
Here are a few reference books that you might want to add to your library:
Mz Tool Lady
Pat’s friend Stevii Graves shares a few of her clever and inexpensive tool ideas. I’ll definitely be using the emery board trick real soon… why didn’t I think of that!
It is always fun to find quilty uses for non-quilty items.
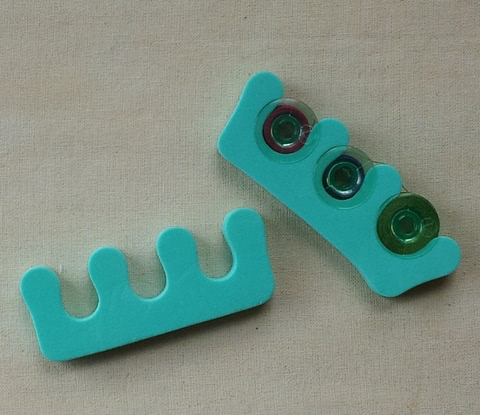
Treat yourself to a pedicure. Dream about quilt designs as they massage your feet. To keep nail polish from getting on your toes a little foam separator is placed between your toes. Once the polish is dry the foam thing-a-ma-jig is removed. If anyone tries to throw away the foam thing, hit ’em with your purse! Instead of your toes, put wound bobbins in the foam thing. The bobbins will be held tight and will not unwind. Its a great way to transport bobbins to a class or retreat.
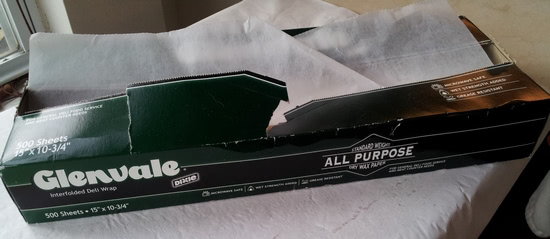
Deli paper can be found is big box stores, like Costco, and it’s intended use is to wrap sandwiches. Smart quilters know that it has better uses. It can be used to draw and trace patterns and as a stabilizer when sewing decorative stitches. It is also a perfect thing to protect your ironing board when fusing small pieces. Its not release paper, but can be a great protector for ironing board and iron. If you insist on using the deli paper for food, I’d recommend wrapping chocolate!
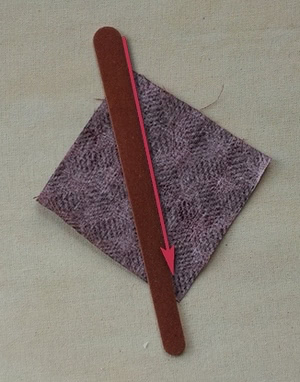
Drawing a diagonal line onto fabric and then sewing a 1/4″ seam allowance on either side of the line is a fabulous way to make half square triangles units. Instead of using a slippery ruler, use an emery board. It provides a straight edge to draw against and it will never slip around on the fabric.
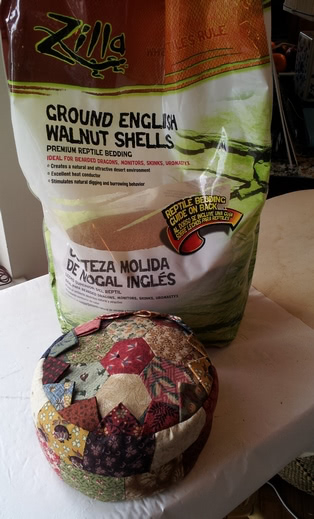
Pin cushions are so much fun to make as gifts. To fill the pin cushions, take a trip to the pet supply store and buy a bag of reptile bedding to use as the filler. Reptile bedding is ground walnut shells, which machinists use in tumblers to polish metal. Your pins and needles will love being stuck in a pin cushion filled with reptile bedding. Use a kitchen funnel to pour the shells into the pin cushion.
Standard Quilt Sizes
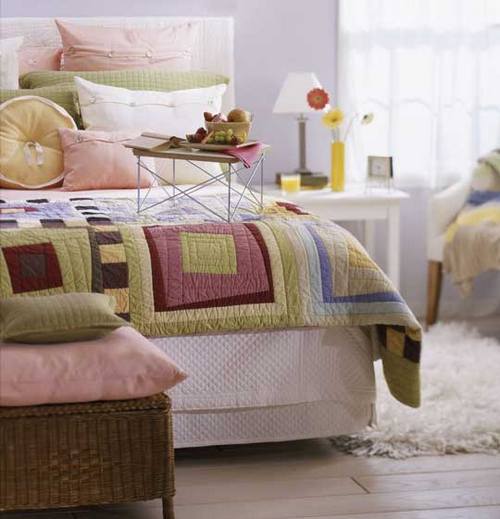
Our friends at American Patchwork & Quilting have an article about determining a quilt size
and a PDF document of the standard quilt and batting sizes. More info on sizes including table toppers is available at the Sewing/Needlework web site.
Give-Away
Long post … are you still with me?

The good folks at Sullivans are giving away two 6.5″x24.5″ The Cutting Edge rulers. See them in action YouTube videos. You can buy them in your local quilt shops or at Joann’s or Keepsake Quilting online.
To enter the give-away, in the comments below answer “What are your favourite ruler sizes?”. Two winners will be randomly selected March 15th.
Congratulations to the winners. Check your inbox for an email from me.
#6 Sandy A
#76 Dawn





Love my 12″ square and 6×24″. Often wish I had others but work well with these thus far.
Great post! I like the manicure thing-a-ma-jig – never thought of that and am running to dollar tree TONIGHT. I have a ruler that is 8X18 that I used in architecture school – don’t remember where I even got it – BUT it is my FAV – I use it all the time.
BTW – I don’t have a rotating cutting board, I use my 12 x 18 and put it on top of my larger mat, and just flip it around – it works great!
Love these tips!
Sad to say, but I only have one ruler: 5×18. It would be great to have a new one. Some rulers that I have tried, though, seem too small or too large to be useful.
My favorite ruler sizes are: 6-1/2″ X 6-1/2″ and 6-1/2″ X 24″. You can do nearly everything with these two sizes. These are the rulers I always recommend when I teach my beginner quiltmaking classes. Thanks for the chance to win this giveaway. I’d love to try these sharpening rulers!
I love the 6.5 X 9.5. It is so versitile and most cuts can be made with this ruler size.
My favorite–being the ones I use most are a six inch square up and a 6 x 24 inch.
Over the years, I have accumulated lots of rulers including some very funky sizes that are not very useful. I love my 12.5 inch square up ruler, a 5 x 18 that is perfect to use for cutting5 inch strips to use with charm squares or 2.5 inch strips to use with jelly roll strips. I also depend on my 6 x 24 that serves an assortment of purposes.
hmmm…I love my 6″ x 24″ my 12.5″ square my 6″ square and my 6″ x 12″. Great post breaking things down!
Right now my favorite rulers are the 4.5″, 6.5″ and the 6.5″X12″ as I am working on a quilt with a lot of HSTs.
Don’t have a 6.5″X24.5″ yet, but I am slowly accumulating my tools…. my father said, “Buy the best you can afford and you will never be sorry”. He was a smart man ;-).
My favourite ruler size is the 6.5 square and the 12.5 square. They are the perfect size for my cutting mat, because while my cutting mat is much larger, it’s always filled with fabric and other tools.
My favorite rulers are the 6×12 and the 6×24 both of which n
need to be replaced- numbers are getting lost . So I would love to win your ruler. Thanks for the chance.
Pick me! Pick me! (waving arm frantically in the back of the classroom)
A ruler that sharpen’s your blade? Sounds fantastic. Will it allow your blade to be used indefinitely?
Pat/Michele
What a timely article for me! A new look once again at what is out there and how everyday items can be put to good use in quilting. The rulers I tend to use over and over are the 6″ x 12″ olfa, the 4″ x 4″ and the 15″ x 15″ olfa rulers. I love my strip cutter and wouldn’t be without any of these 4 cutting assistants.
Thank you for the opportunity to possibly become a winner of one of these lovely new rulers, in Canada where I live these tools are astronomically expensive, winning one would be fantastic.
My 2 favorites are the 6.5″ x 24″ and the 9.5″ Square
I mostly use my 8 1/2″ x 24″ ruler. I do a lot of large borders so the 8 1/2″ is perfect for this. When cutting smaller fabrics for block of the month projects, I use my
6 1/2″ x 12″ ruler because it is so easy to handle.
My favorite rulers, or at least the most used (!) are the 3 x 18 and 9 1/2″ square. I just bought my first Cutting Edge ruler (16 1/2 ” square), and am looking forward to keeping my rotary cutter blades sharp!
I have three rulers. One is for inch, 6″ x 12″. The other two are for cm, 15 x 15 and 15 x 60. I use all three of them a lot and they are getting worn out. Could really need a new one.
Thank you for the article! Very interessting.
Gun, Sweden
My favorite ruler is the Omnigrid 1 x 12. I think I even have 3 of this one. Great for trimming edges of wool, for paper piecing to trim the seams allowances to 1/4″ and marking diagonal lines on squares. I use this ruler for everything…just small and handy!
Thanks for all of the great information! I have been quilting for 12 years and picked up a lot of new ideas from this post. I already used crushed walnut shells from my LQS for pincushions….but I had no idea I could get a much larger bag for probably a lower price at my local pet shop! And let’s all just admit that we have many more pairs of scissors and rotary cutters (and rulers, cutting mats, and FABRIC!) then we could possibly use at one time! At least I do! LOL!
Thanks for all the tips, I especially like the emery board idea. My most used rulers are the 6 x 24″ and my 6.5″ square up ruler.
My favorite is definitely the 6 1/2 x 24 1/2. It’s the first needed and I love it even more with my new hand protective piece that I’ve added. It is easier to pick up, too.
I guess the two I use the most is the 6.5 x 24 and the 4 x 14 rulers. Thanks for all the great info you have passed along to us quilters.
My most used rulers are 6 1/2×24 1/2″, and a 6 1/2″ square. I keep a 1X6″ near my machine for trimming and making sure my seams are 1/4″. I grab a 16″ for squaring up my blocks. I agree that it’s best for a beginner to test products before investing. It will save them time and money in the long run! And make learning easier. Great info! Thanks.
I do like my 8 1/8″ x 24″ ruler for cutting yardage and my 9 1/2″ square. These are my 2 favorites but I do use other sizes like 6 1/2″ x 24″ and 12 1/2″ square. Several good rulers are a must!
My favorite rulers are a 12 1/2 x 12 1/2 in ruler and a 61/2 x 24 inches. I do have other rulers but I have noticed for myself that these two are the most used. The smaller rulers get lost when I am cutting out a large quilt and these size rulers seem not to get lost as often as smaller rulers!! he he
My most used is the 6.5″x24.5″. I love my 1″x6″ that I always have near my machine. The second favorite is the 15.5″ square. I have a assorted square rulers when I don’t need the “big guns”.
i can’t live without my 6.5×24.5 – it is my work horse. the other one i love is the 12.5 sq – i use it to “clean up” my squares…
I love my 6.5 x 12.5 ruler. It is my go to.
I love my 3×16 (It used to be 3×18 until my daughter stepped on it!) It is small enough to use when paper piecing or trimming small bits, but it’s big enough to (almost) stretch across a FQ or half yard. It’s a very versatile size!
I love my little 1 X 6″ ruler I have 4 of them and can never find one when I need it, guess I need to buy more. I also use my get squared ruler all of the time it has measurements for 8 1/2″ and 4 1/2″ squares.
I love my 6×24″ ruler (although 6.5×24.5″ would be even better!), my 6.5″ square and my 12.5″ square rulers. Use them ALL the time! :)
My favorite ruler is my 12-inch square, but then I only have 2 rulers. I was kind of thinking I need more and after seeing your post, I realize there’s no shame in having many different sizes and colors!
My favourite rulers are the 2.5 x 2.5in and the 6 x 12in. These rulers are great for using in small spaces, on trays, with miniatures, travelling – you can tell I use them everywhere!
I love to use my 12.5in square to trim up blocks and also the highly used 6.5in square to do the same. Of course it goes without saying that I use many other rulers too but these I find so handy! :)
My favorite rulers are the 6.5 x 24 and the 6 x 12. I like to use the 6 x 12 when I have to cut a lot of smaller pieces. This was a great blog about quilting tools.
I make a lot of mini’s, and trade charm squares. I use
my 1″x6″ ruler, 4.5″ square, 5″ square.
I like my 6×12 best.
I would love to win one of these rulers. My favorite rulers are my 15″ square and my 8″ by 24″. I have smaller ones I use often also, but I find that often these two are my go tos when cutting strips to start a quilt.
My favourite sizes are 6 x 24 and my 6.5 inch squaring up ruler. Coincidentally, my 6 x 24 inch ruler has become a little curved on the edge after 10 years, so I need a new one!
My favourite sizes are 6×6 inches, and 9.5 square rulers.
6×12 and 6.5″ square. I’ve been doing a lot of 6″ blocks lately!
I use my 6 x 24 ruler and my 12 1/2 inch square rulers the most.
I don’t like to play favorites with my rulers, so don’t let them read my comment. I usually use my 6×24 and my 12.5 because I can cut almost everything I want with them.
My favorite rulers are my 12 1/2″ square and my 6 1/2″ Bloc Loc ruler. I also really like my Wing Clipper and Tucker Trimmer by Deb Tucker.
Thanks for all the info! i love it when others share their ideas. My go to rulers are the 12 1/2″ square and my Add a Quarter ruler. I not only use it for paperpiecing, but it’s perfect to use to cut between hsts or for the ‘extra’ triangles on flying geese. I have a small one and a small cutting mat that i keep right next to my machine.
My favorite rulers are my 12.5″ square and my 5×24″ ruler with a lip on it to keep it from moving. Thanks for the giveaway!
My favorite rulers are 6 1/2×24 1/2″, and a 6 1/2″ square. Love this post
My favorites are the 6 x 24 and the 5 x 5.5
WONDERFUL, informative blog. i would recommend it for any new quilter. I love my 12.5 inch square, my olipfa, and a smaller square depending on the size of block. i REALLY needed a 4.5 inch square and only had an 8.5 inch square. it was a bit clumsy. i have a wide selection at home but not for the road. i think i need to modify my on the road rulers.