
The Aiming for Accuracy quilt-along (QAL) was held in the Summer/early Fall of 2013. The lessons, blocks and detailed photo tutorials have been removed from this site and are now available for sale as a complete booklet.
Find out more about it here: Aiming for Accuracy Booklet.

Welcome everyone to our official FINAL lesson of the Aiming for Accuracy Quilt-Along (A4AQAL). I will do another blog post next week where I’ll be discussing some finishing ideas for your quilt. This is the last official tutorial.
On October 24th, I’ll put up a blog post where you’ll be able to submit your final photo(s) to be eligible for the grand prizes. You’ll have until October 31st at 6:00 a.m. to enter. Your quilt doesn’t have to be quilted and bound, just the finished quilt top, with all three borders, will be required.
The free tutorials will be removed from this site, the shopping cart system and Craftsy on October 31st early in the morning. Please be sure that you’ve downloaded all necessary files and saved them to your computer. The A4A Booklet will be available on the same date too. If you’ve enjoyed the QAL, I do hope you’ll show your support and purchase the Booklet.
If you’re new here, check out the main QAL page where you’ll find all the information that you need.
There’s still time to submit your Lesson 15 (or 16) photo(s) to be eligible for the prizes for last week. Submit your photo(s) here.
Our Volunteer Prize Coordinator, Amy Gay of Butterfly Angels Quilting, will choose winners on Monday and will announce the winners on the prize blog post, in our Facebook Group and send emails. Please be sure to check your spam folder as Amy has been having difficulty reaching some of the winners from previous lessons.
Reminder: We are chatting up a storm in our Facebook Group, come join us, and you can also share photos in our Flickr Group too.
Inner Border

Outer Border
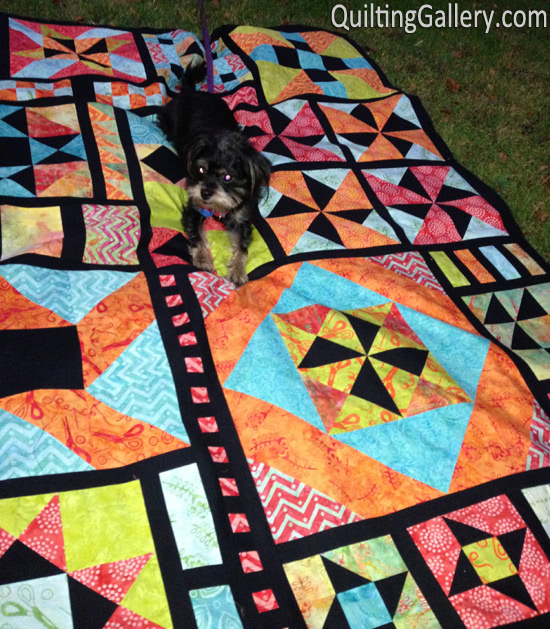
You’re done!!! I will share my completed photo, with all three borders, in the next couple of days. For now, here’s a shot of Milo and the inner border.
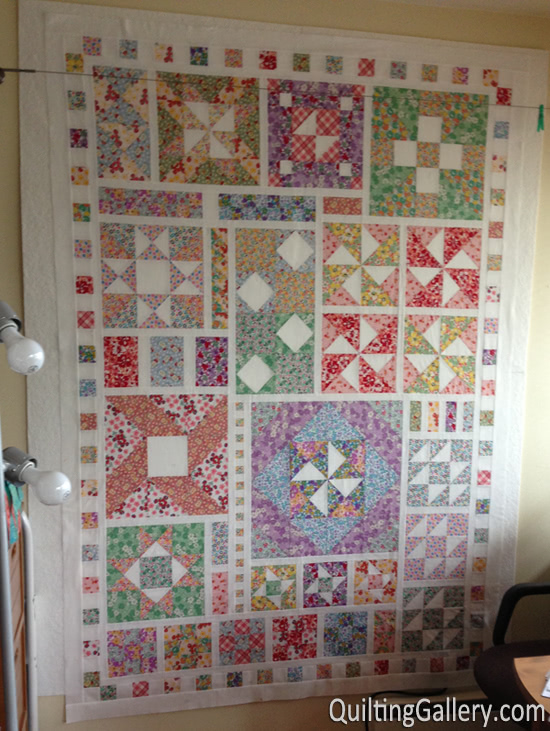
Below is my 1930’s version. Keep in mind, for this version, I opted to have the prints and white contrast in the checkerboard-style border reversed than the original design where the prints are in the corners.
Backing
For the backing of this quilt, I decided to use up as much of the leftover print fabric as I could. I like my backings to be 2″ to 3″ larger all around than the quilt top. Mine finishes at approximately 64″ x 88″.
First, I created the centre strip from leftover pieces. The height of this strip is 10″ cut. I had lots of little pieces left too, so I pieced them together, then cut them at 10″ too.

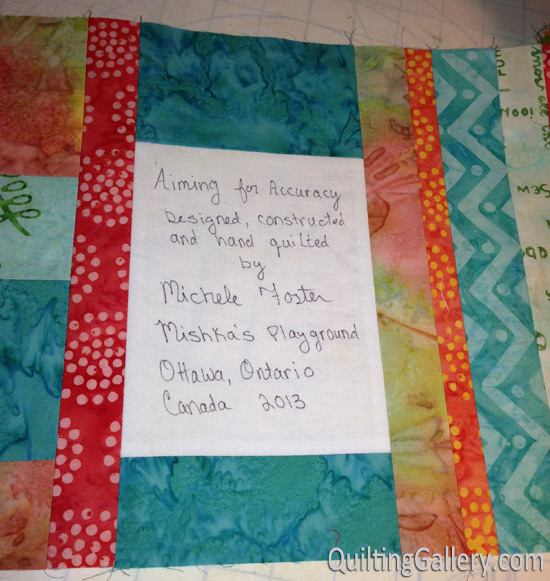
I also created a label and pieced that into the 10″ strip.
I still had lots of fabric leftover, so I created six strips of prints, cut at 5″ wide by 42″ long. Here’s what I ended up with … a funky, modern-like backing.
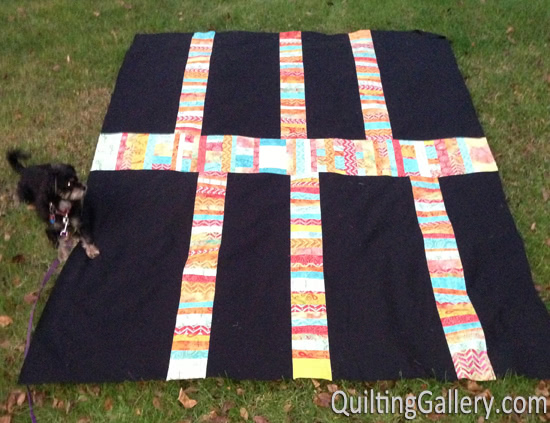

The black sections for my backing were cut as follows, going from left to right: Top – 12.5″, 14″, 10.5″, 15.5″ and Bottom – 17.5″, 10.5″, 14.5″, 9.5″.
Piecing the back took me a lot longer than I had planned. Depending on the length of your backing fabric, mine was 42″ long, you may need to make adjustments. I chose to use the 10″ and 5″ cut strip size as those work with the 20″ size of a fat quarter.
You can piece your back as desired.
Disclaimer: This quilt design, tutorial and all photos are copyright Michele Foster of Mishka’s Playground. Please respect my copyright and do not copy this tutorial or republish it, for free or for sale, in print or online. You may use this tutorial to create quilts for your own personal use for free or for sale. However, please credit Michele Foster of Mishka’s Playground for the design. No mass production is allowed.
Thank you very much for the wonderful quilt pattern and lessons! Started late but can’t wait to finish the quilt. Great design!