
Hi everyone, welcome to Block 11 of the Beginner’s Quilt-Along (QAL). If you’re new here, you can join the QAL at any time. Sew at your own pace, the tutorials will be available indefinitely. See the main Beginner’s QAL page for more information and additional links.
Pat Sloan is quilting along with us too. She’s making three sets of blocks using her gorgeous Eat Your Fruits and Veggies fabrics. Check out Pat’s blocks on her blog.
Don’t forget to upload your completed block to the Flickr group each week for a chance to win prizes. Winners are chosen randomly from the completed blocks submitted by 2:00 p.m. EDT on Wednesday. Check the UPDATED Sponsors and Prizes page to see all the goodies.
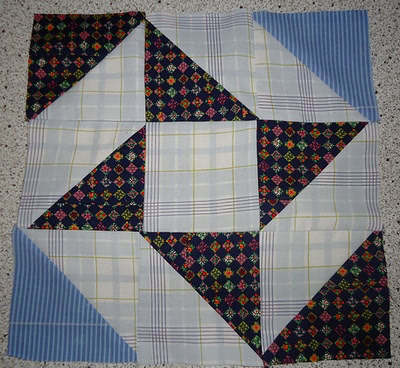
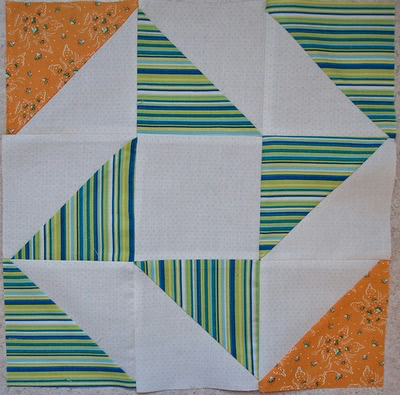
Block 11 – Read Books all Summer
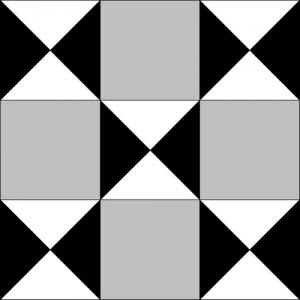
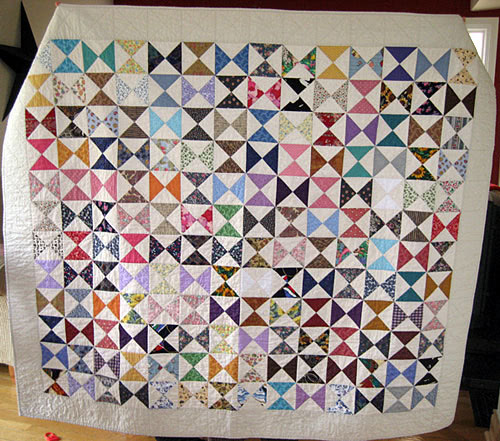
This week’s block is Read Books all Summer. It has five quarter square triangle (QST) units and four squares. The QST unit is often referred to as an hour glass block. Here’s a scrappy hour glass quilt I made for my sister a few years ago:
A note about block colours: I chose to represent this block in 3 colours; however, you could make your QST units scrappy if you wish.
Beginner’s Lesson and Block Tutorial
The beginner’s lessons and block tutorials for the Beginner’s Quilt-Along have been removed from this site and are now available for sale as a complete booklet.
Find out more about it here: Breezy Beginner’s Sampler Quilt.

Prizes for this Week
We have two prizes to give-away this week.
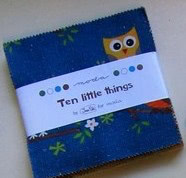
We have a lovely 10 Little Things charm pack from Moda to give-away:
The Fat Quarter Shop have donated a set of their new Little P’s patterns. These quick and easy patterns are perfect for the beginner quilter.

Block 10 Winners
The winner of the set of Little P’s patterns donated by the Fat Quarter Shop is:

The two winners of the Bloc-Loc Rulers that I featured in Block 10 are:
If you’re a winner, please check your photo on Flickr for instructions. I have not heard from wenine9 who won last week. Please email me.
I have never spiraled the seams. I may try to learn to do that. Tonight time got away from me so I just got the QST’s made and trimmed but didn’t do the spiraling. (yet)
Everytime my 4year old son looks at these block on the disign wall, he tells me to make him ones like these as well. Now I’m thinking instead of sashing and borders, just to put all the blocks toghether and make a small wall hanging for the boys room. But, I will wait untill the end, to see how it all turns out before I deside.
I’m nervous about making these qst blocks
I was nervous too, I found them to be the most difficult so far.. And of course I messed up and had to seam rip a few :)
The QST’s were not as hard as I thought they would be, but lots of trouble getting the points right on the block. I’m gonna make some “practice” blocks.
Hi Betsy,
Check the photos from Block 6 where I talk about joining the rows and sewing through the X formed by previous seams.
http://quiltinggallery.com/2012/07/12/beginners-quilt-along-block-6/
We won’t be doing QSTs in our last two blocks, but it’s good to get the practice.
Cheers,
Michele
I do not use that technique (didn’t know about it) but I am going to start.
I spiraled my four patch seams. I need more practice now.