
Hi everyone, welcome to Block 8 of the Beginner’s Quilt-Along (QAL). This week, I have not included a beginner’s lesson; I’ll make up for it next week. Also, over in the Flickr group is a discussion about doing a Level 2 QAL, please let me know if you are interested here.
If you’re new here, you can join the QAL at any time. Sew at your own pace, the tutorials will be available indefinitely. See the main Beginner’s QAL page for more information and additional links.
Pat Sloan is quilting along with us too. She’s making three sets of blocks using her gorgeous Eat Your Fruits and Veggies fabrics. Check out Pat’s variations of Block 8 on her blog.
Don’t forget to upload your completed block to the Flickr group each week for a chance to win prizes. Winners are chosen randomly from the completed blocks submitted by 2:00 p.m. EDT on Wednesday. Check the Sponsors and Prizes page to see all the goodies.
Block 8 – Play On the Seesaw

This week’s block is Play On the Seesaw. It is more commonly known as Spool from 1931, but first appeared in 1906 as Fred’s Spool and again in 1937 as Empty Spools.
Below are some variations for this block. You’ll see that not all of them follow a 3×3 grid where each unit is the same size. For our block, our units are equal in size.
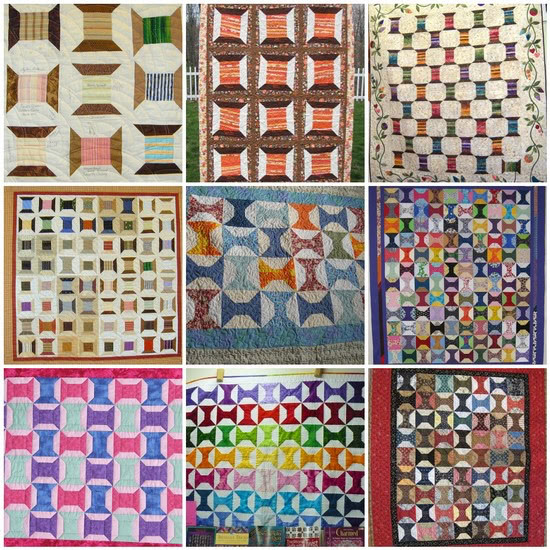
A note about block colours: This block uses a minimum of two colours to create the design; I chose to use three colours in the black and white drawing as well as my fabric choices.
Beginner’s Lesson and Block Tutorial
The beginner’s lessons and block tutorials for the Beginner’s Quilt-Along have been removed from this site and are now available for sale as a complete booklet.
Find out more about it here: Breezy Beginner’s Sampler Quilt.

Prizes for this Week
We have two prizes to give-away this week.
The Fat Quarter Shop have donated a set of their new Little P’s patterns. These quick and easy patterns are perfect for the beginner quilter.

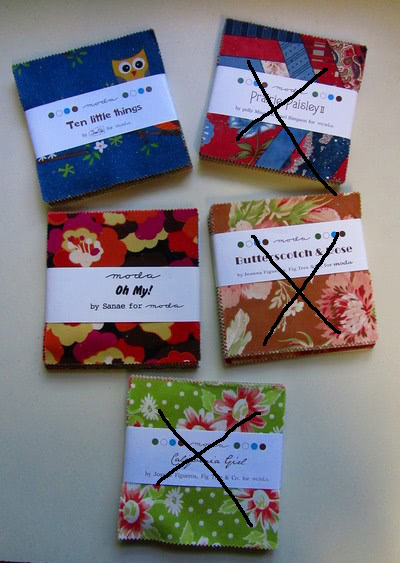
Second, we have a lovely charm pack from Moda to give-away (10 Little Things and Oh My still available):
Block 7 Winners
The winner of Pat Sloan’s scrap bag of her new fabric, Eat Your Fruits and Veggies, is:

The winner of the set of Little P’s patterns donated by the Fat Quarter Shop is:
If you’re a winner, please check your photo on Flickr for instructions.
thanks so much!
I’m just now starting, hope I can catch up quickly. Looks like fun, even though I’ve been quilting for 20 years!! It’s always good to go back and refresh your instructions fron the beginning. Thanks a bunch, and Happy Quilting!!!
This is a wonderful class! I am enjoying it very much!!! Thanks for doing it!